
Finding something of use in someone else’s trash is exciting. It can also be a little intimidating. There have been plenty of times when I’ve driven by something which could be amazing and I don’t stop for whatever reason.
Ahhh but, this is what us DIYers love, isn’t it? We want any and all junk. We see potential even if we aren’t sure how we’re getting there.

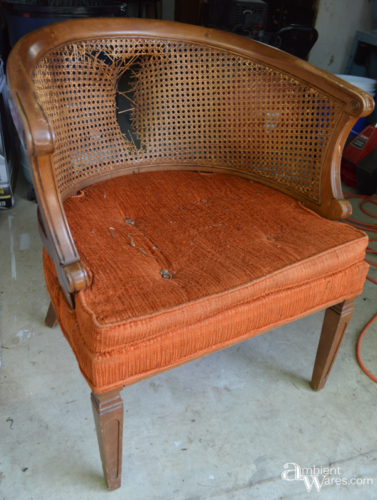
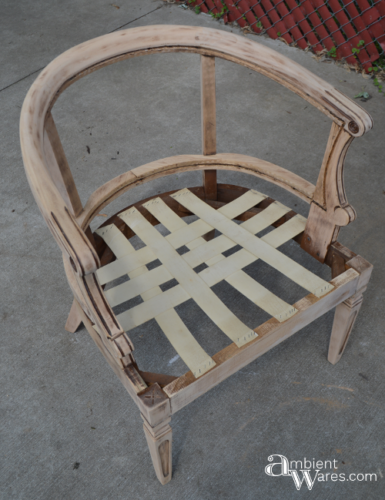
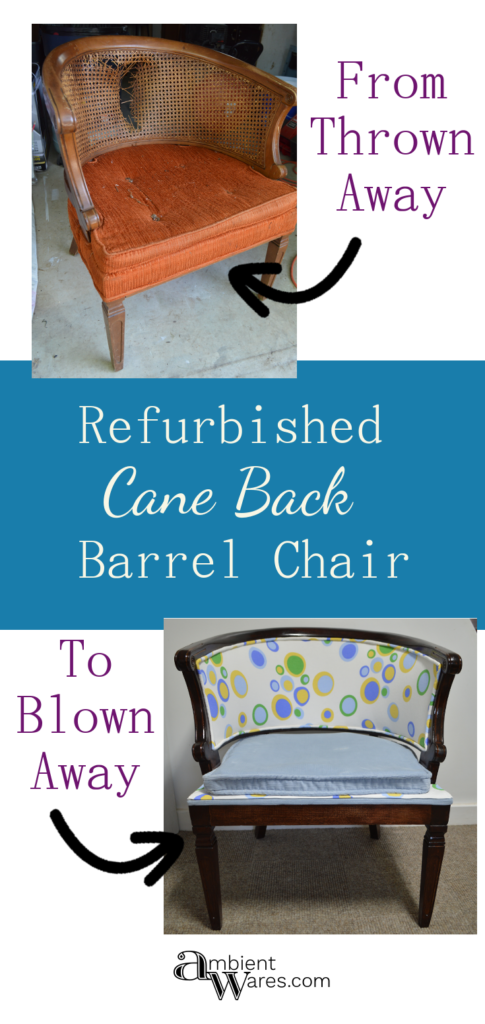
What I should have seen however, before swiping this old cane back barrel chair from the trash, is how this would yet again, be something to stump my brain and make me wonder why I think I can do these things.
Refurbished Cane Back Barrel Chair
Please know this post includes affiliate links. If you click on a link and make a purchase, I receive a small commission with no extra cost to you. Click here for my full disclosure. Thank you!
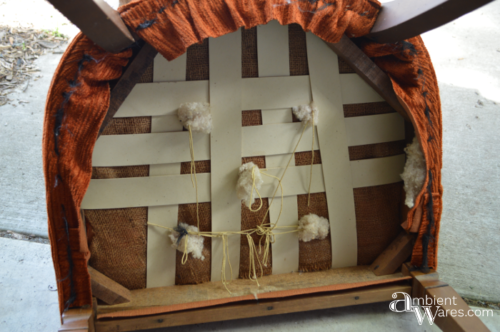
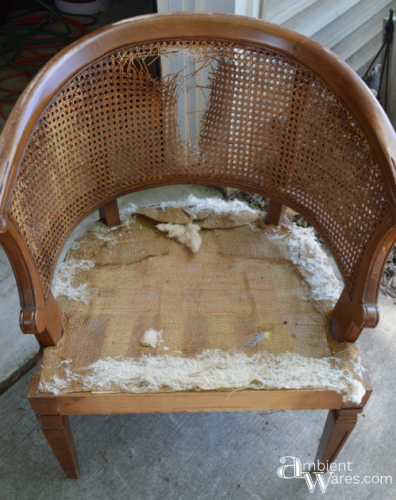
REMOVAL OF CUSHION, PADDING, & STAPLES
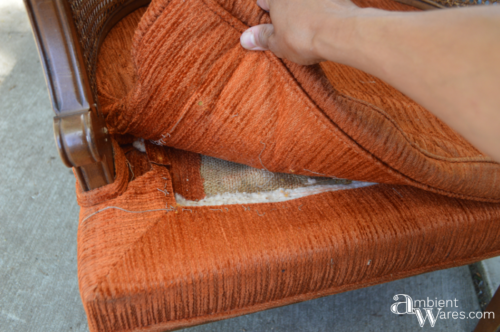
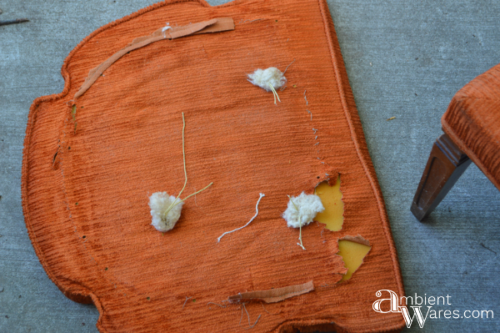
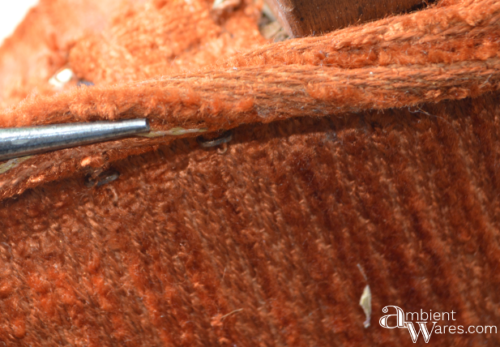
I thought the cushion could be easily pulled off but, it was sewn and tacked all around plus there was piping in the way. Carefully, using a utility blade, I would pull up, and gently slice the threaded connections. I did this repeatedly until it was separated.

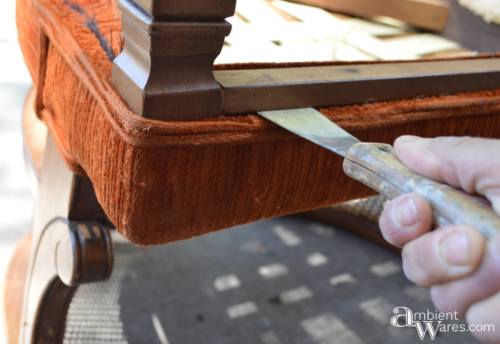
The fabric around the base came off next. Flipping the chair over, I took off a wooden bar (not exactly sure of its purpose) using a putty knife to gently wiggle it and its nails out of the chair. When I had a large enough gap between the bar and the chair, I pried it off using a hammer.
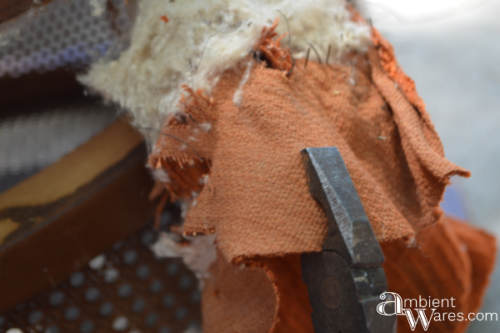
Once the bar was removed, it was on to taking out staples. I broke my staple remover at some point and resorted to using a stubby flat head screwdriver and needle nosed pliers. I definitely need to buy a new staple remover.

Staples were hidden everywhere. I would think a section of fabric was free, only to find out there were more staples under something.
Then, out of frustration, I grabbed a larger set of pliers and got a little rougher with taking the fabric off.
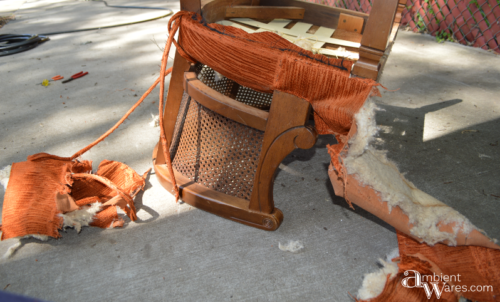
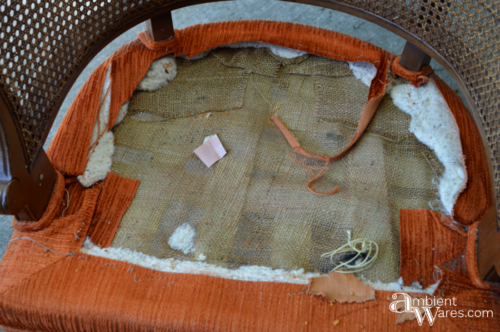
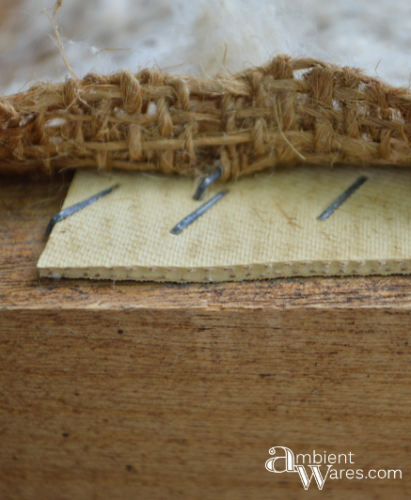
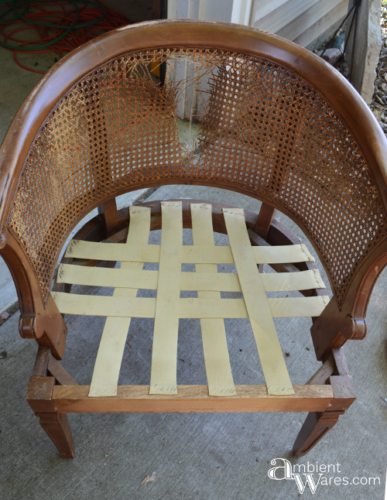
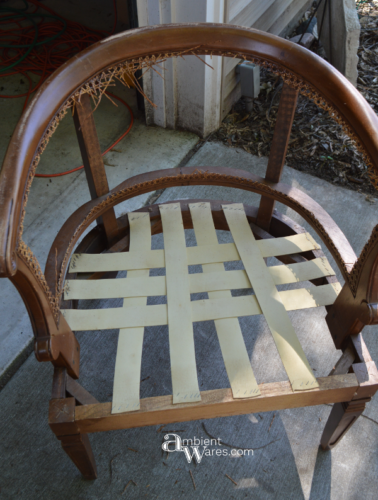
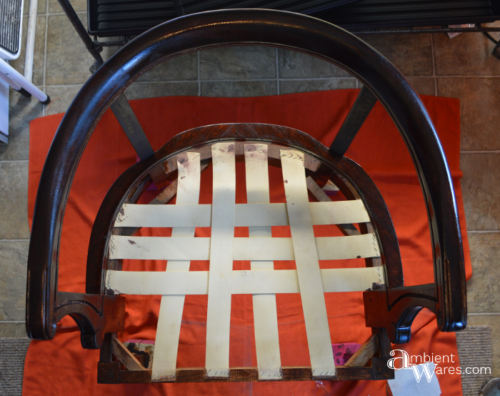
All that’s left is the burlap layer which was also stapled. I had to make sure I did NOT remove the staples holding the woven fabric.
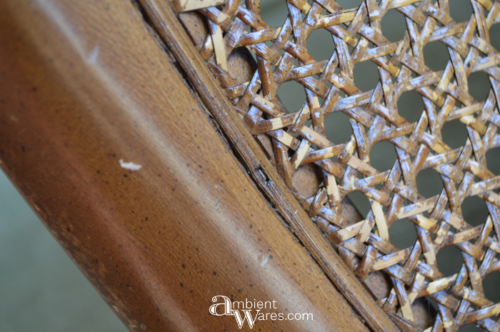
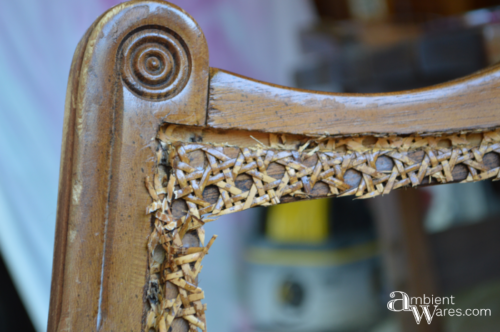
REMOVAL OF CANE & SPLINE
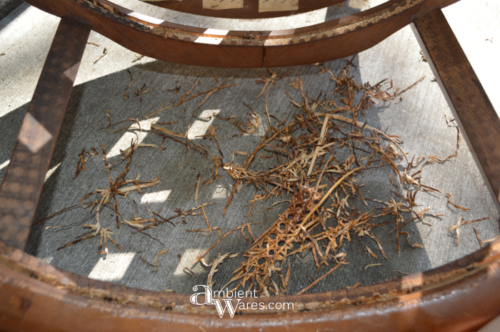
I cut out what I could of the cane, leaving the spline behind. The spline is what fits into the groove, holding the cane in place, which was stapled and glued.
I found a video showing the use of an actual steamer in order to remove the spline. Since I don’t have one, I used my iron set to steam.
Note: This made my iron extremely dirty leaving brown and black, sticky marks. I tried cleaning it with a baking soda and water paste along with a scrub pad. It removed some but, not all.
I’d hold the iron close to the cane spline with my right hand, periodically pressing the button to release steam, while tugging the spline with needle nosed pliers with my left. It was amazingly easy to do, came out fairly clean, and with only a few spots I’d have to focus on scraping out at the end.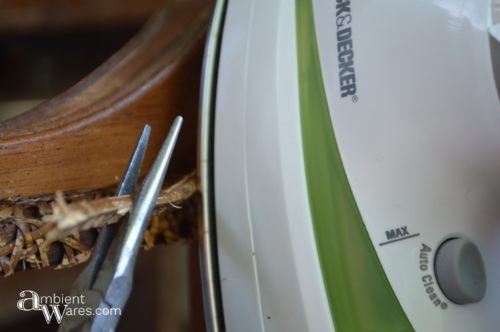 You can see the spline is gone and the caning is adhered to the chair. I picked it off and anything stuck in the groove, I’d slide the pliers through to scratch them out.
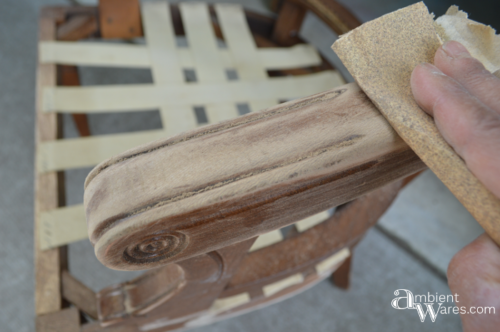
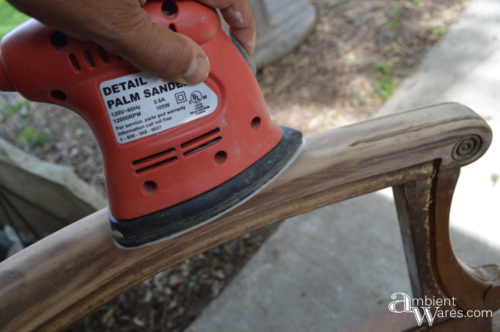
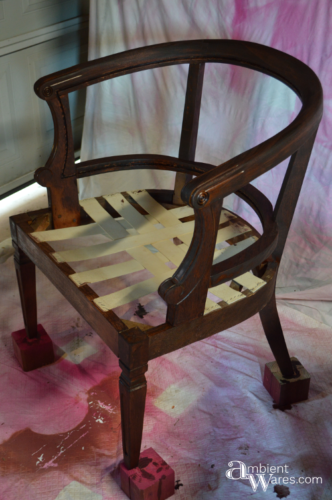
SANDING & PREPPING
At this point, I’m doubting my ability to put this thing back together based on how it came apart. To be on the safe side, I filled in all the little holes left by all the little staples with wood filler and began sanding like a mad person because I wanted to stain it. 

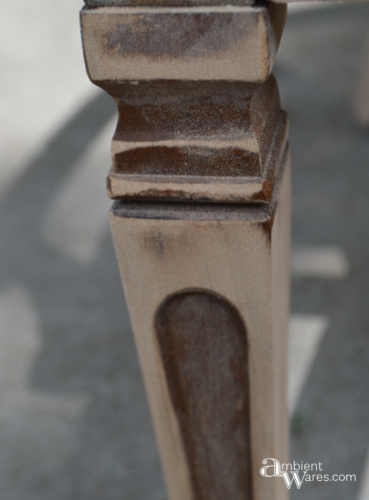
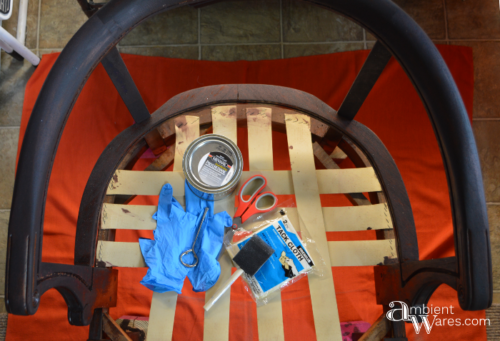
STAINING & SEALING
Once again, as in the small dresser, I used my go to Red Mahogany; 2 coats. Finishing with 2 coats of Polyurethane in a glossy finish; sanding in between coats.
Did you know it says on the Red Mahogany can to use Polyurethane and not Polycrylic to seal? The Polycrylic will mute the red making it look brown.
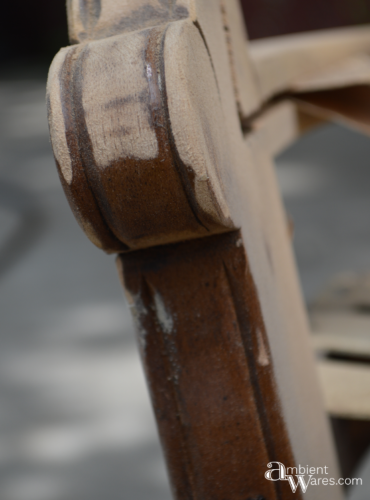
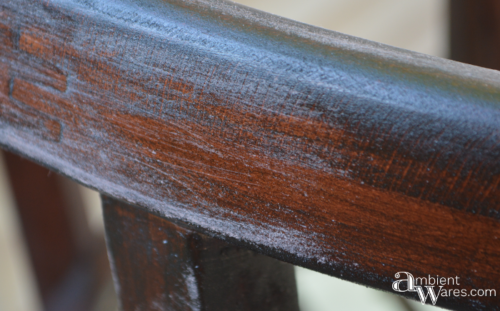
This is after staining.
Below, is once the stain was dry and before sealing. The thing I’ve noticed with the Red Mahogany is, while it does soak in, it never seems to really dry. It always feels damp or wet but, it’s taken care of once sealed.
I’m sure there are thousands of different combinations of types of woods, types of stains, and brands of stains which play into this. I do need to learn more about how to identify different woods as well.
It always makes me nervous when sanding between coats of sealer. It just never looks good and I have a fear I’m ruining it.
Until the next coat and all is well with the world.
In Refurbished Cane Back Barrel Chair – Part 2 I’ll show you how I create the cushion. If you just wanna jump to Part 3, you can find that here.
I can see the amount of work that went into this project so far! I’m looking forward to seeing how it turns out! Thanks so much for sharing with us at Snickerdoodle, we love having you. Pinning to share.
Thanks Laurie! I’m glad I pushed through it. The chair is finished now and I’m pretty happy with the result!
Oh my I can’t wait for installment 3. What you went through taking it apart but the frame looks fabulous.
This is such a great transformation. Lots of work is going to pay off! I can’t wait to see the finished chair. Thanks for sharing at Snickerdoodle!
Thanks Beverly! I think it turned out pretty good for never having attempted a redo like this 🙂
I can tell this was a labor of love–great tutorial! Visiting from Snickerdoodle 😉 Blessings, Cecilia
It was difficult but, absolutely worth it. Thanks Cecilia