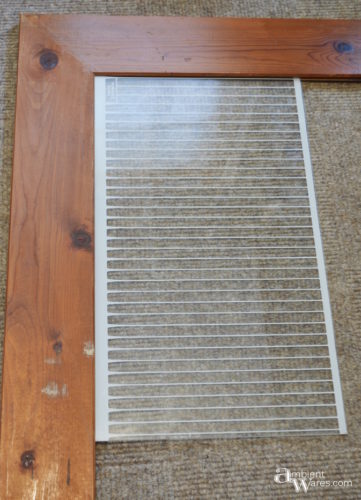
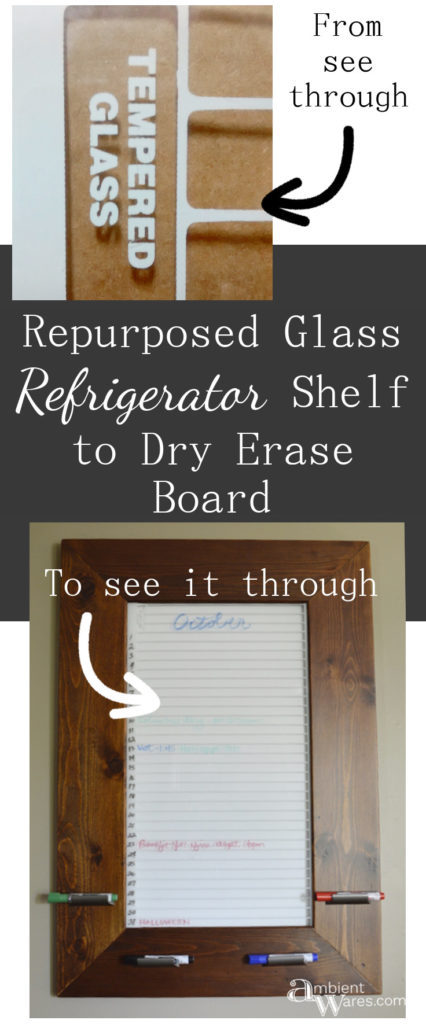
I was at my dad’s shop helping out following him around when I see this old refrigerator shelf. So many things went through my head.
- Why does he have an old refrigerator shelf?
- Where’s the refrigerator?
- Does he have a plan for it?
- Are there at least 31 lines going across?
- It has more than 31 lines?
- No more than 31 days in a month.
- A monthly organizer.
- Yes, I’m going to make a dry erase board organizer.
The things that float through my head at warp speeds.


Please know some links in this post are affiliate links. If you click on a link and make a purchase, I receive a small commission with no extra cost to you. Thank you. Click here for my full disclosure.
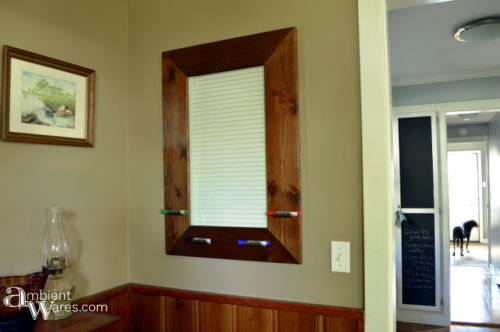
Needless to say, it was mine. From the start I envisioned it framed but, allowing us to see through the glass meaning the frame wouldn’t have a back. Or at least not a permanent one but, what would this entail and how would it look?
Joe and I sat down to draw out what each of us were thinking. We’ve learned over the years our words confuse each other when trying to describe our “inventions”.

- Joe thought we could frame it up, route the edges, and lay the glass within those edges. Basically a giant picture frame. Then we’d need to figure out how to secure the glass to the frame without covering the entire back because at that time I didn’t want anything permanent.
- My idea was to route the frame pieces creating a groove along the skinny sides like on tongue and groove flooring. We could attach the two sides of the frame to the bottom frame piece, then slide the glass into the frame, attaching the top last.
Our garage is so full I always know we have something if not everything we need to complete an entire project. This was no different. Joe said he’d look in the garage (I sensed the doubt in him) and comes back with some pieces looking like the tongue and groove wainscoting we have in our dining room and it was…extras left by the previous owners 11 years ago.
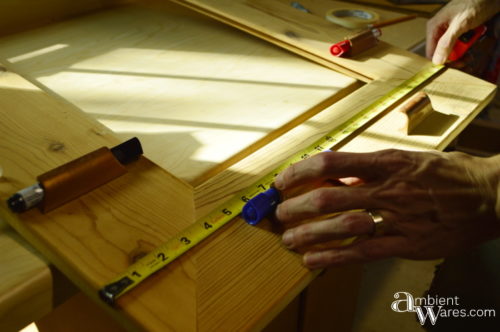
Taking Measurements
These pieces would accomplish exactly what I was envisioning so long as we had enough. It sure looks like plenty, doesn’t it? Getting up close and personal with it showed otherwise.
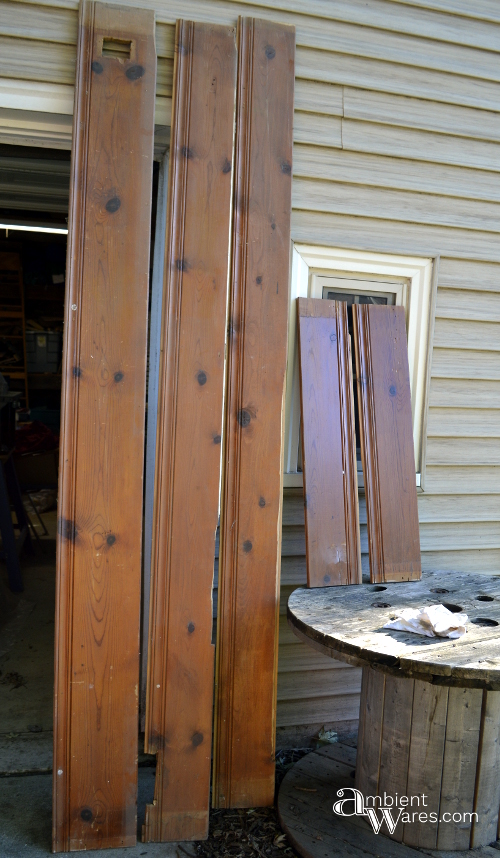
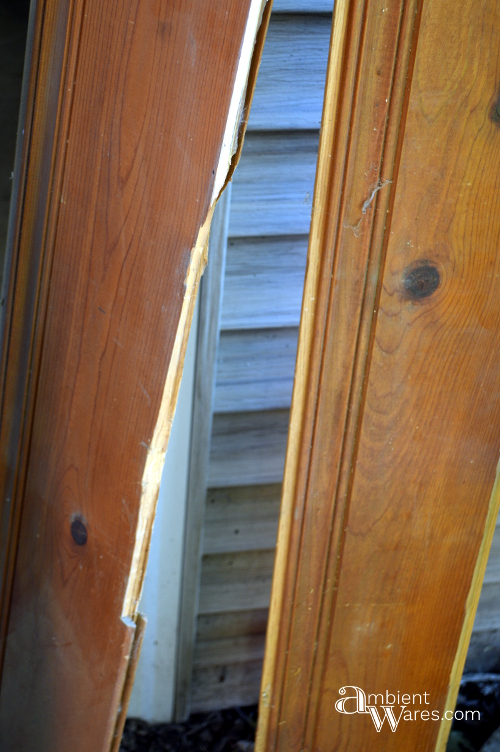
There were so many pieces broken off, gouged, etc., I was doubting we’d have enough. We had to be very careful in looking over the pieces and precise with the measurements needed for each side of the frame.
Other things we needed to take into account:
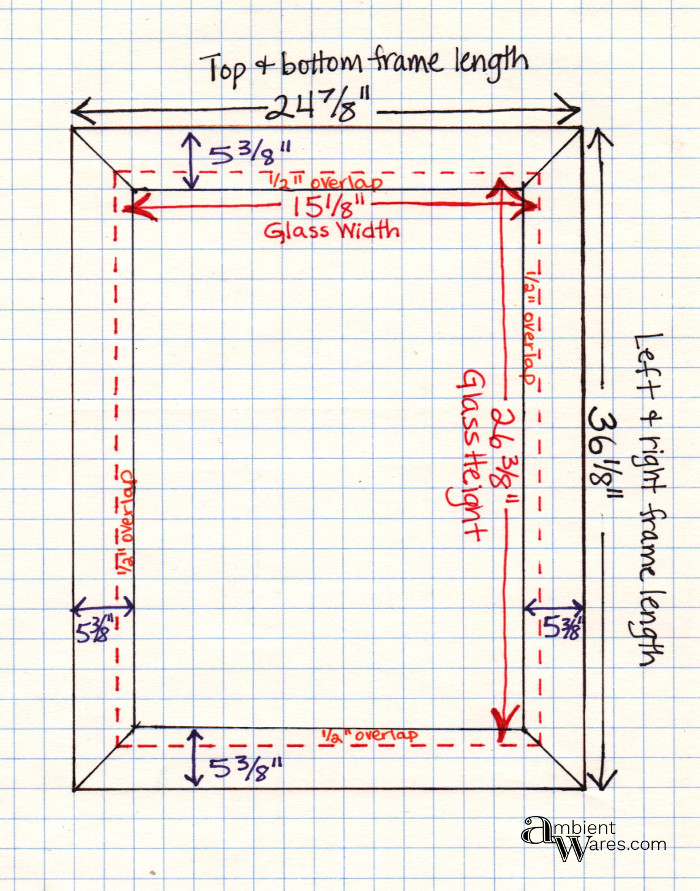
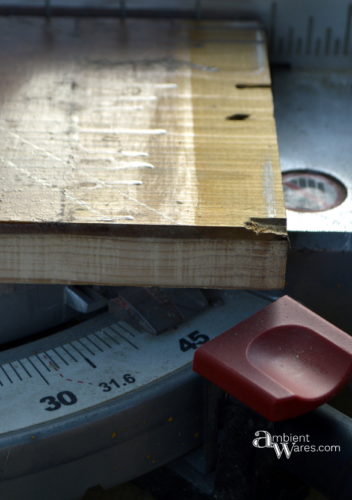
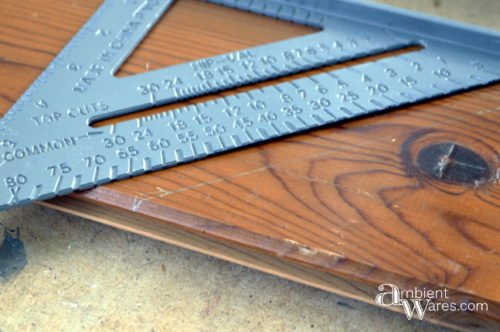
- 45° angles – We couldn’t just measure the glass. We’d need to add on the width of the frame (5 3/8″) as well so they’d meet at the corners.
- The glass will sit within the groove 1/2″ on all sides meaning we’d need to subtract 1″ width wise and length wise.
For those, like me, who have to see it:
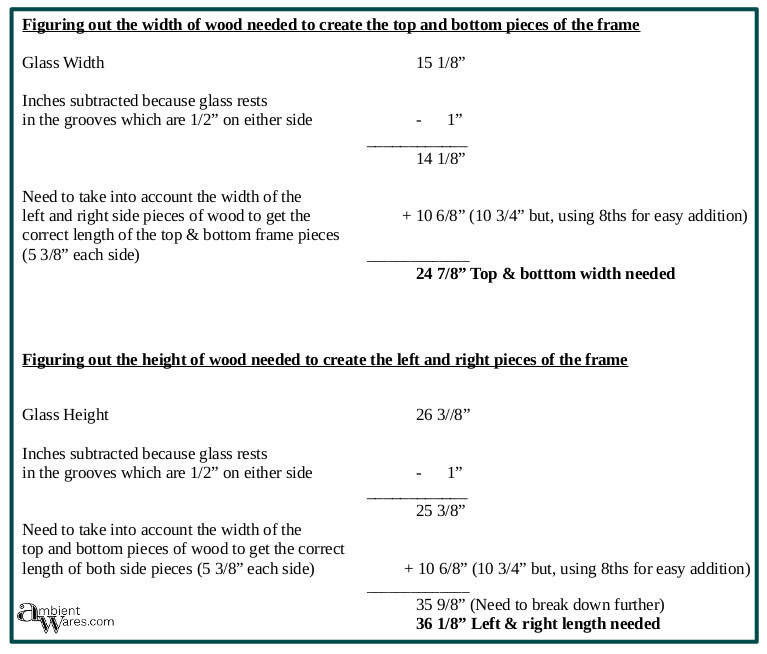
For those wanting to see the math:
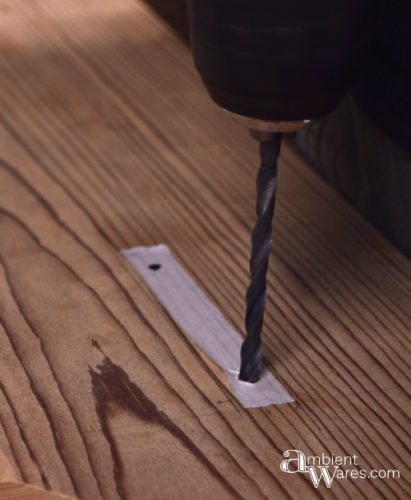
Cutting the Pieces
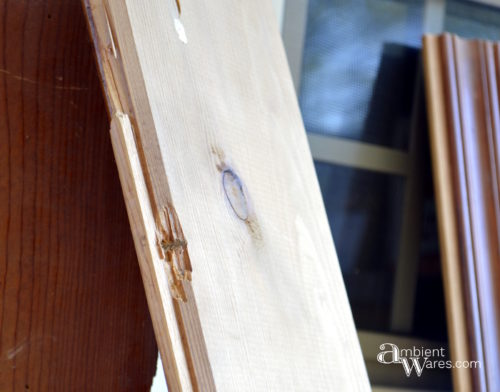
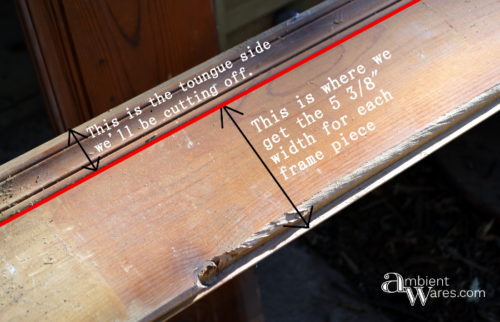
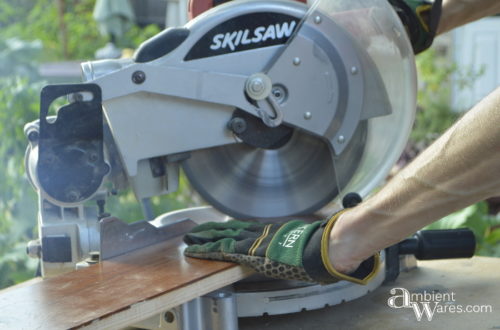
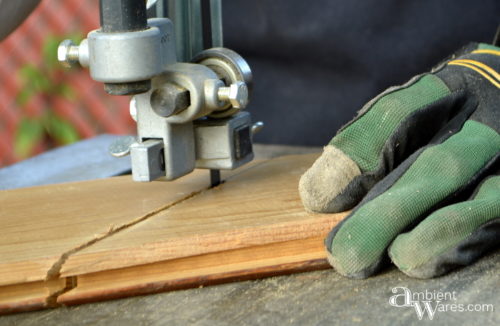
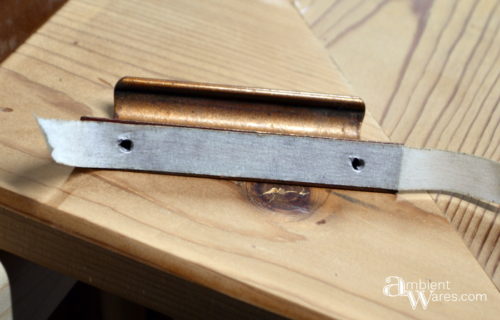
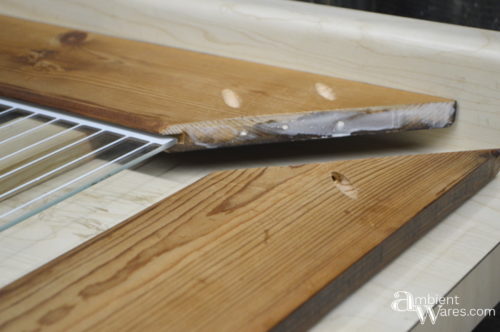
We first cut the pieces of each frame piece slightly longer than what we needed making sure we didn’t waste any of the most pristine pieces. Then we cut off the tongue side of each piece with the band saw (table saw would be easier, but we don’t have one yet).
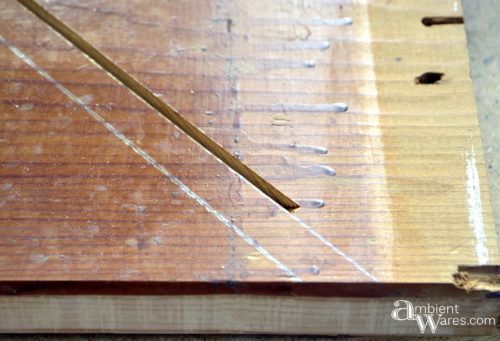
Everything above the red line will be removed and everything below will be for the frame. This piece, for example, was not able to be used due to damaged groove.
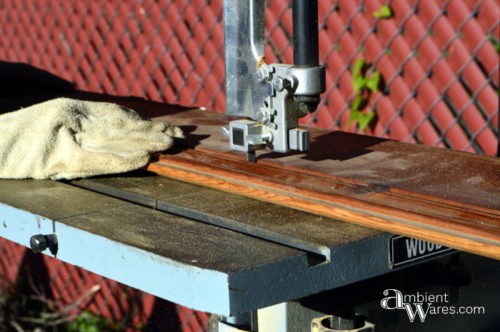
After we shaved off the tongue side, we measured and marked the 45° angle and cut with the miter saw. The only bad thing is that our miter saw didn’t cut the entire length and we had to finish it off with the band saw. If we had a compound miter saw, it wouldn’t have been a problem but, ours does not extend.
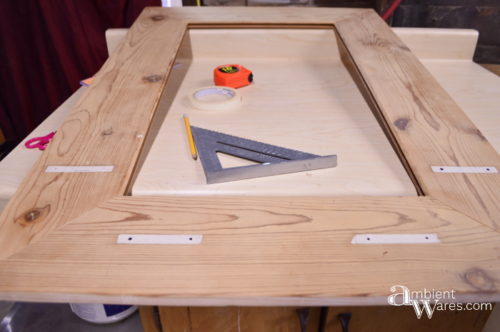
Test Fit
After cutting one angle on two pieces, we did a test fit.
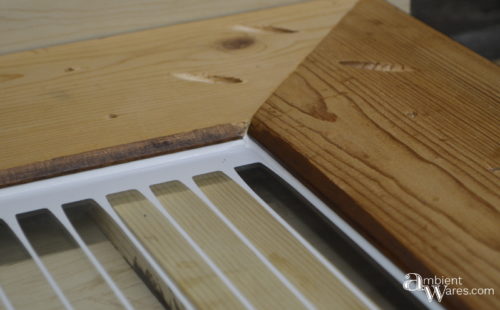
When we tried to match up the outer corner, the inner corner (where the glass is) did not match up and vice versa. It’s very minimal in difference but, we wanted the inner corner to be what matched and we could always sand down the outer corners later to even it all up.
To find a good starting point for the rest of the angles we decided to measure with the glass still in place. We used a scrap piece of the same wood, slid it onto the glass, butted it up against the long piece and marked it with a pencil in the corner. We’d then make the line of a 45° angle using a square and cut.
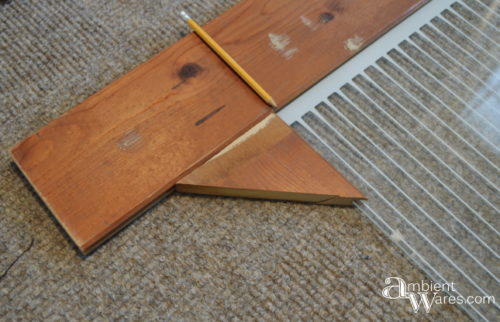
The image below is not the line drawn for the above but, this is how we drew each line for the 45°.
Securing Frame
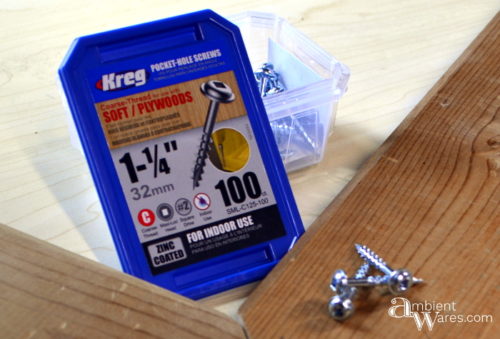
OK, this is where I say we had to buy a couple of things to secure the frame pieces together. After many, many, many attempts at creating our own jig from scrap wood, we broke down and bought a Kreg Jig mini. Lemme tell you…I finally understand what all the stinking fuss is about.
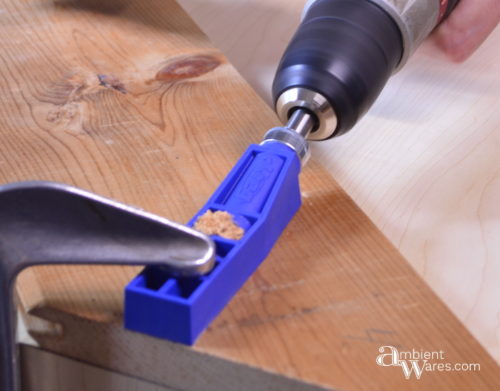
While Kreg Jig offers great, easily understandable directions on how to use it based on the thickness of wood you’re working with, we still had to figure out where exactly to place the screws and we decided to use 3 total at each joint.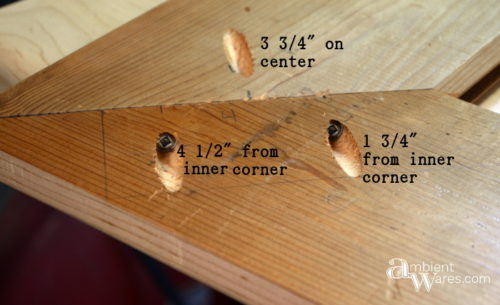
Sanding & Second Test Fit
We took the boards apart, sanded them down then did a second test fit just to make sure.
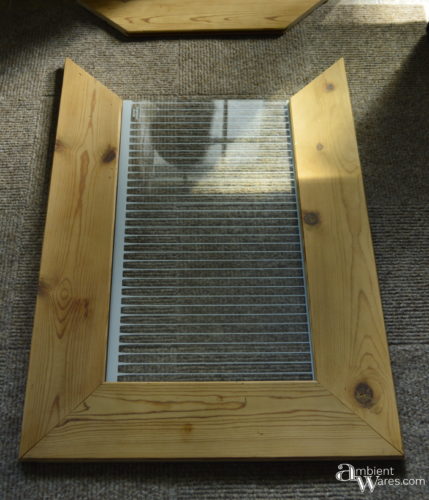
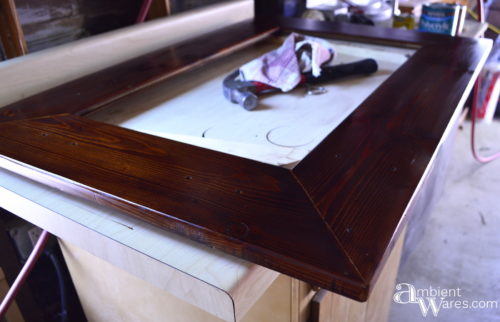
Holy s#!t. It’s beautiful.
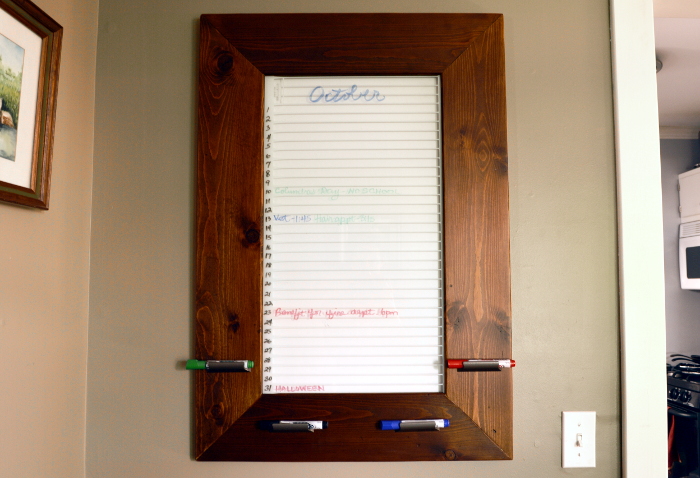
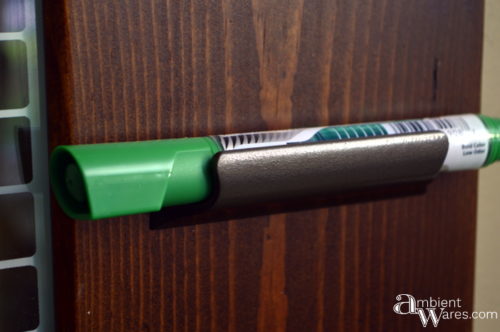
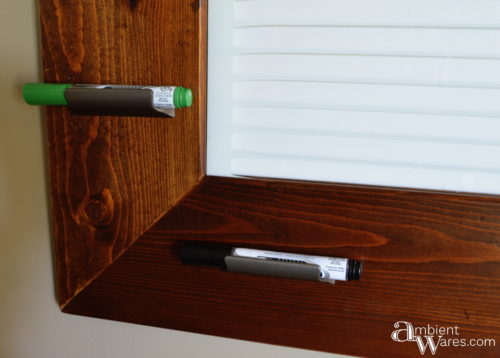
Holders For Dry Erase Markers
I had a couple of ideas for holding the dry erase markers until I was organizing my garage for the 100th time and came across some old cabinet door handles I bought at a garage sale all for 50¢! 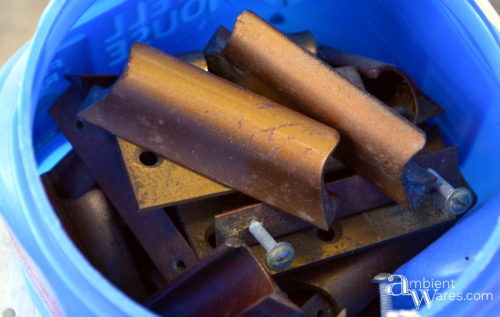 We placed the pieces onto the wood to see what they’d look like and began measuring.
When it came to attaching the hardware, I’d remembered a tip I saw over at H2obungalow where she used tape to transfer the holes perfectly! Genius really.
Staining
Once all of the holes were drilled it was on to the staining. I used wood conditioner first and I’ve only used it one other time and it was on pine for another potential project and I wanted to see if it was necessary.
I did stain the pine pieces with and without the pre-stain and you could tell the difference. I’m not sure if I needed to do it on this wood but, I wasn’t taking any chances.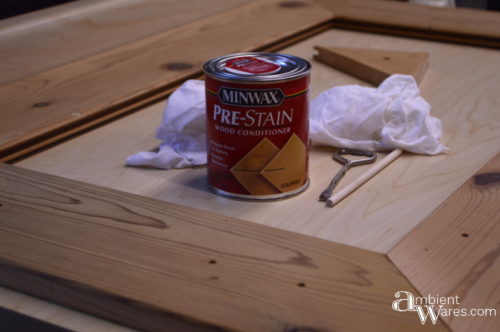
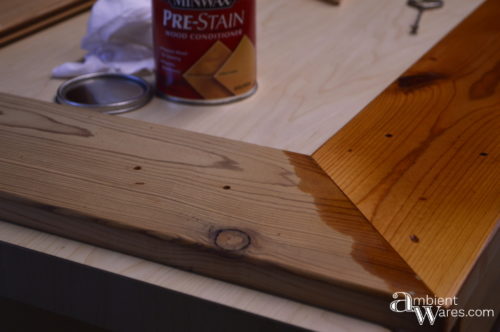
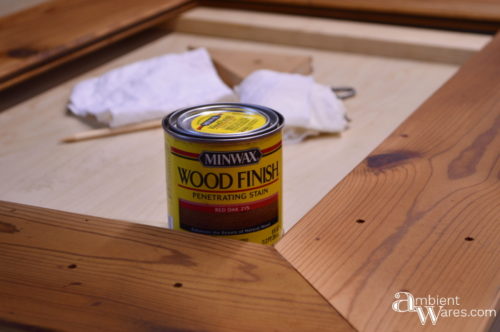
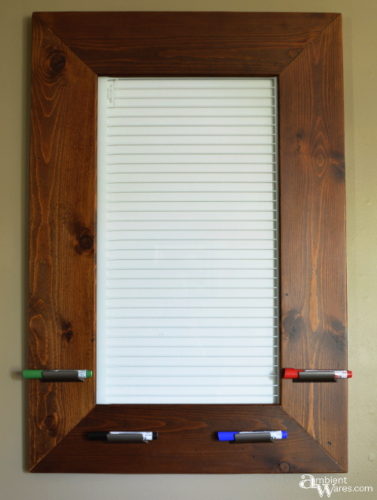
The stain of choice was my tiny can of Red Oak like I used here. Followed by Polycrilic in Clear Satin finish. We did not stain the back.
Gluing & Caulking
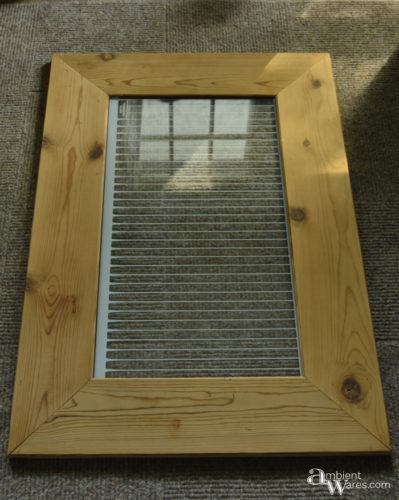
After the front was good and dry, we flipped it over and inserted the glass. We removed the screws, glued the joints, then put the screws back in for even more security.
The glass, which is slightly thinner than the groove, bounced back and forth and to resolve the issue, we used clear caulk on the back side of the glass. It goes on white but, once is cures completely, it goes clear.
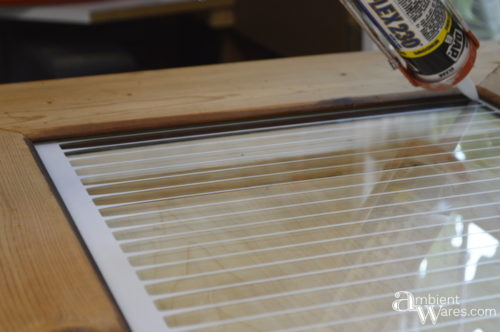
You can barely see the white caulk below but, it’s there.
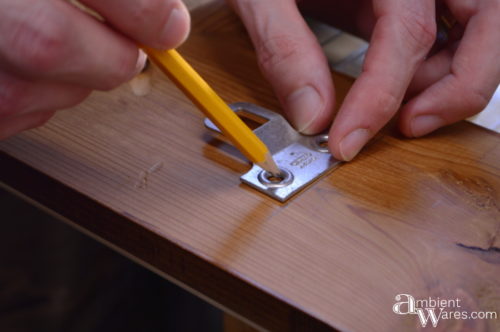
Installing All Hardware
We found a couple of heavy duty hangers we had on hand, measured everything out and attached them.
Then we attached the old hardware handles I’d painted with RUST-OLEUM’s Hammered Bronze.
Extra bits of info:
- I ended up attaching a thin 1/8″ piece of wood I painted white, to the back of the frame. It just didn’t look right without a white background.
- The fact that the white background I added is about 1/4″ away from the glass, it makes the lines cast a slight shadow which kind of looks cool. However, I think I’m going to go ahead and cut the backer down to fit right up against the glass instead.
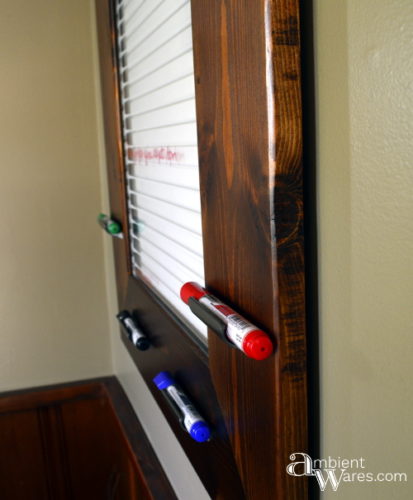
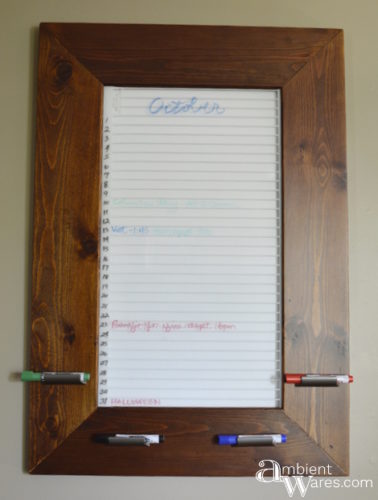
- I decided to try BIC markers instead of EXPO (which is what I’m used to) and for some reason the green marker did not show as well as the other colors.
- I think I need a lesson in taking pictures of glass because I took a million before deciding heck with it.
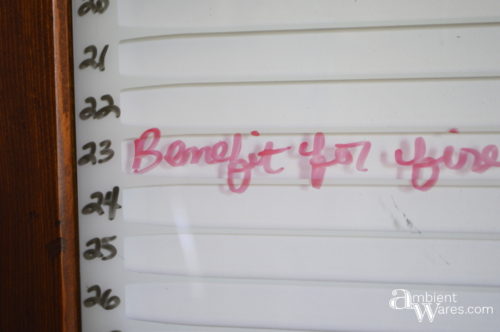
- The glass has tiny scratches, front and back from actual use, with the most noticeable one being seen on line 24. This particular scratch is on the back side but, the glass has them on both.
Click image below to PIN!
Holy crap, you are a genius Angie. Well you and Joe both are. I’m so glad that there are other couples out there talking around each other, filling in the gaps and then making it work. Match made in DIY heaven, just like the organizer. How did you even see the possibilities? I love this idea.
Lol! Thanks, Michelle! Honestly, it was one of those things where I knew immediately what it was going to be. I love those kinds of projects and I wish it happened more often! 😀
This is genius! What a great re-purpose!
Thanks Sara!
OMG! This is an excellent job, a fabulous idea, and I would be all so happy to have such piece. Wow! Next time I see an old fridge on the side of the street, I will stop to see if there a glass shelf still in tack. Thank you-thank you.
Yay! I’m so happy to hear that you not only love it but, hope to find something like it! Good luck to you and I’d love to know if you do 😀
BRILLIANT!!! I would never have thought about doing this! I have two pieces of glass shelves in my garage right now from a bookcase that was damaged and had to be trashed. I’m going to add this to my project list. 🙂
Thank you so much Cindy! Glad to hear those shelves will find a new purpose 😀
Love this idea – what a clever way to repurpose an old fridge shelf. Your tutorial is awesome! Thanks linking it up to our Power Tool Reader Challenge 🙂
Thanks Marie, for the kinds words and for hosting the challenge!
I absolutely LOVE this! Such a creative way to repurpose the glass!! Clever!!!
Thanks Kate!
What an amazing repurpose, so creative! Thanks for sharing with us at the To grandma’s house we go Wednesday link party! Hope to see you there tomorrow!
Thank you Tarah!
I hope you kept this – it’s a keeper for sure!
Hehe! I do still have it but, that could always change 😉 Thanks Sara!
What a clever idea! I love it.
Thank you Sherry!
This is such a smart project! LOVE how you repurposed the shelf and your tutorial is spot on! My Kreg Jig is one of my favorite tools. The Power Tool Challenge Team has a Reader Challenge going on for projects that cost $10 and under. The team votes on the best on & the winner gets a huge Ryobi Power Tool package.. You should enter this via the linky.. didn’t mean to go “commercial” on you but it’s really good project! You can find the details on my blog:)
Hi Wendi! Thank you for the heads up on the challenge. I would definitely put them to good use 😉
I love this project made from a fridge shelf! What a great idea. Your tips and details are spot on, and you will find tons of uses for that Kreg Jig. 🙂 I have several, and pulled that one out yesterday to repair a table leg. Using the micro meant I didn’t have to take it apart to repair and strengthen it.
If you have a cutting machine, I’d add permanent numbers on the left side. In February, you would just have room at the bottom for extra notes.
I love the way you used the cabinet hardware to hold the markers.
Thanks for sharing at talk of the town!
gail
That’s a great idea about the numbers Gail! No cutting machine yet but, maybe one day 😉 I’m in love with the little kreg jig. I don’t know how or better yet, why, I lived without it for so long! Thank you so much for stopping by and for hosting!