I know you can buy a lamp kit at a store ready to go, but what about those details that have already been figured out for you? If you ever decide to truly make your own lamp out of something else, from scratch, it isn’t always as simple as what the kits make it out to be. What are the things you need to take into consideration before building a lamp? I created this basic introduction to some of the parts used when building lamps.
Hi everyone, this is Joe, Angie’s other half. Since we like to make lamps and discuss the processes on how, I thought it best to share a bit more about what goes into making lamps.

Please note that I am not a certified electrician. While I am comfortable taking on lighting projects, I always respect what I don’t know. If you are unsure about something do your research with credible resources or consult a certified electrician.
Please know some links in this post are affiliate links. If you click on a link and make a purchase, I may receive a small commission with no extra cost to you. Thank you. Click here for my full disclosure.
1. Safety First!
First and foremost, never work on a lamp while it’s plugged into an outlet.
Choosing the proper parts for a lamp is critical to ensure the safety of a lamp. Parts should be selected that are UL Listed (Underwriters Laboratories). The UL listing ensures that the part has been tested and verified to work at its specified rating.

When cutting or stripping wire insulation it’s a good idea to wear safety glasses. Snipping the ends off wire can cause them to go flying in any direction.
2. Electricity
In the United States, our mains power is Alternating Current (AC) at 120 Volts (V). Direct Current (DC) is not the same as AC so keep that in mind when searching for parts; make sure it is labeled for AC. The typical outlet in a US home can supply up to 15 Amps (A), although most lamps won’t use that much current.
You can use some basic calculations to determine how much power your lamp will use. Let’s assume for this example your lamp will have 2 sockets and use two 60 Watt (W) bulbs. The following equation can be used to figure out how many Amps the lamp will use:
Amps = Watts / Volts
and for our example:
1A = (2 x 60W) / 120VAC
This tells us our parts need to be rated for a minimum of 120VAC at 1A but it’s always a good idea to over estimate and use parts rated higher than what we need. Electricity flowing through a wire creates heat. You may decide down the road to install two 100W bulbs instead, so let’s calculate that too:
(2 x 100W) / 120VAC = 1.67A
Now let’s round up to 2A and find out the maximum wattage we can use with the following equation:
Watts = Volts * Amps
and for our example:
120VAC * 2A = 240W
So, if we use parts rated for 120VAC at 2A we can use two 120W bulbs. These simple equations can give you a good baseline to start looking for electrical parts. If in doubt, check with a certified electrician or the part manufacturer.
3. Wiring
There are many different types of wire out there and it’s important to use the proper wire for your lamp project. Wire is marked with a gauge (AWG or American Wire Gauge) that describes it’s thickness. A thicker wire has a smaller AWG number (seems counter-intuitive, I know). So, a 12AWG wire is thicker than a 20AWG wire. The thicker the wire, the more current (Amps) it can handle.
Internal wiring is typically color coded (wires not visible / inside a light fixture). The standard color scheme is: white is Neutral; black is Hot; green (or bare copper) is Ground.
Cords are available in single or multiple conductor (a conductor is a wire). Multiple conductor wire will be listed with the wire gauge and number of wires like 18/2 or 16/3. The first number is the wire gauge (AWG) and the second number is the number of conductors. Typical lamp cords are 18/2 meaning there are two 18AWG wires (usually attached side by side). There is a good wire gauge chart available here that will tell you how much current each gauge can handle (see the “Maximum amps for power transmission” column). A cord with 3 wires has Hot, Neutral and Ground. The ground wire is usually attached to the metal base inside a fixture.
The insulation around the copper conductor of a wire has a SPT rating which determines it’s thickness. In this case, the smaller the number the thinner the insulation. The common sizes used in lamps are SPT-1 (thinnest), SPT-1 1/2 and SPT-2 (thickest). It’s important to choose the proper size insulation based on the size of pipe used in the lamp (more on this in the mechanical lamp parts section).
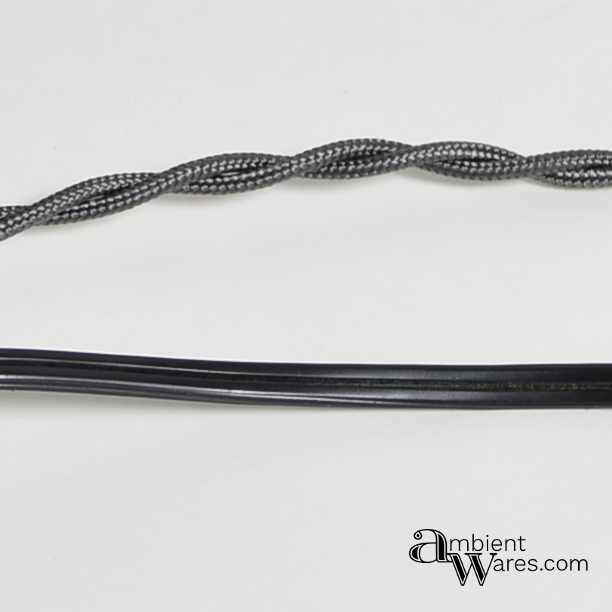
Lamp cords come with a variety of insulation types and colors. The most common is the thermoplastic type. Fabric type lamps cords are popular these days and give your lamp a vintage or antique style. They typically come in two styles; twisted or braided. The braided cords look like a single cord with a fabric outer layer. They are just standard cords with the usual plastic insulation (smooth and ribbed wires) wrapped in a fabric sheath. The twisted cords are two separate wires (black and white wires) individually wrapped in fabric and twisted together.
A polarized plug has two different sized prongs. The larger prong is Neutral and the smaller is Hot. On plastic cords, one wire will have smooth insulation which means it is the Hot wire. The other wire is ribbed meaning Neutral.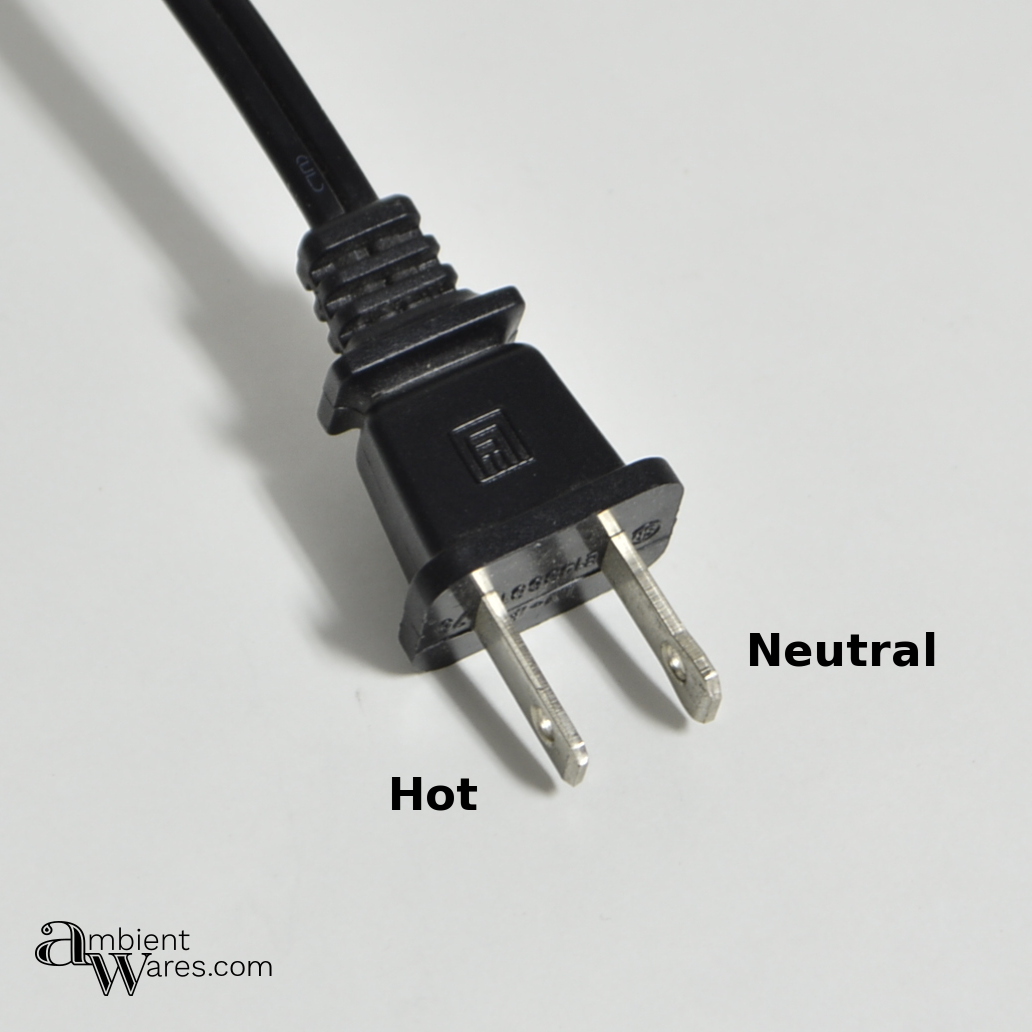
Twist-On wire connectors can be used to join 2 or more wires together. These are color coded based on how many wires of a particular gauge can be joined together.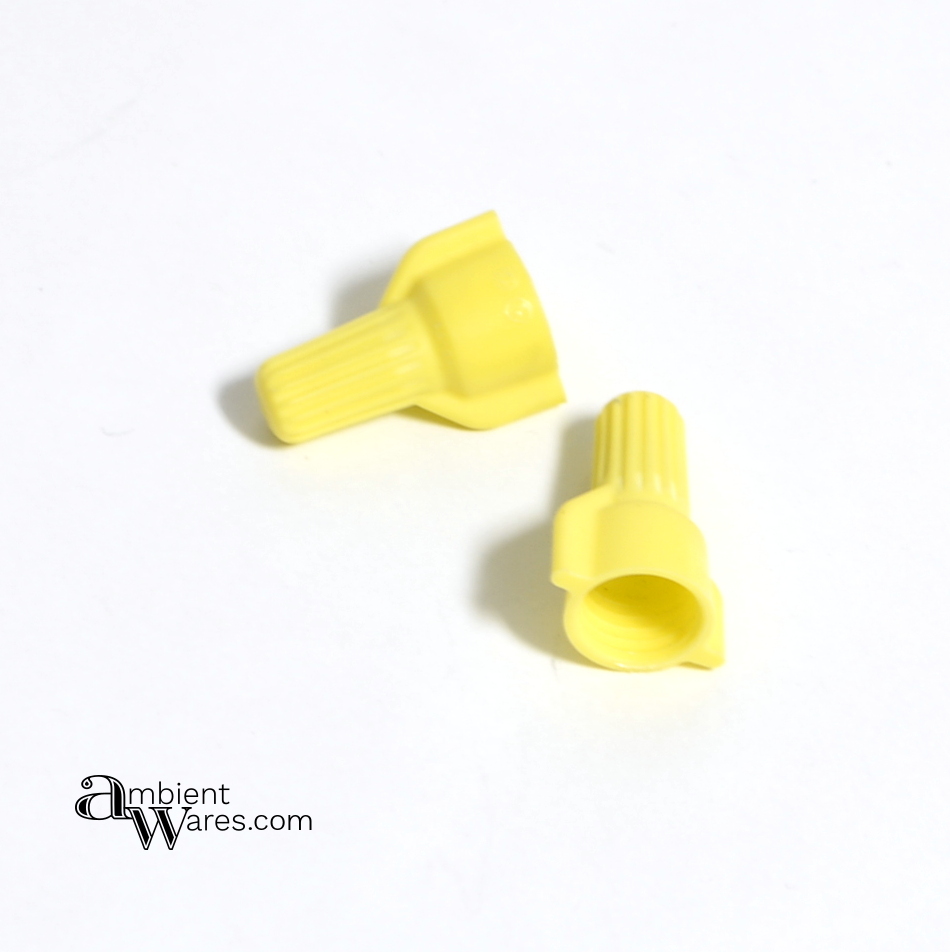
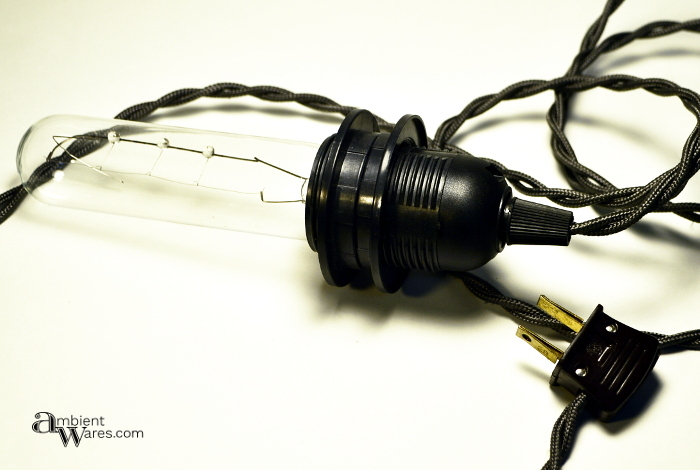
4. Sockets, Switches, and Dimmers
In the US, the most common bulb type is the Medium base (E26 Base / Edison Base). Most lamps will use this type of socket. Another common size is the Candelabra Base (E12 Base) which is smaller and is often used in chandeliers or smaller lamps. There are many more base types that are beyond the scope of this post.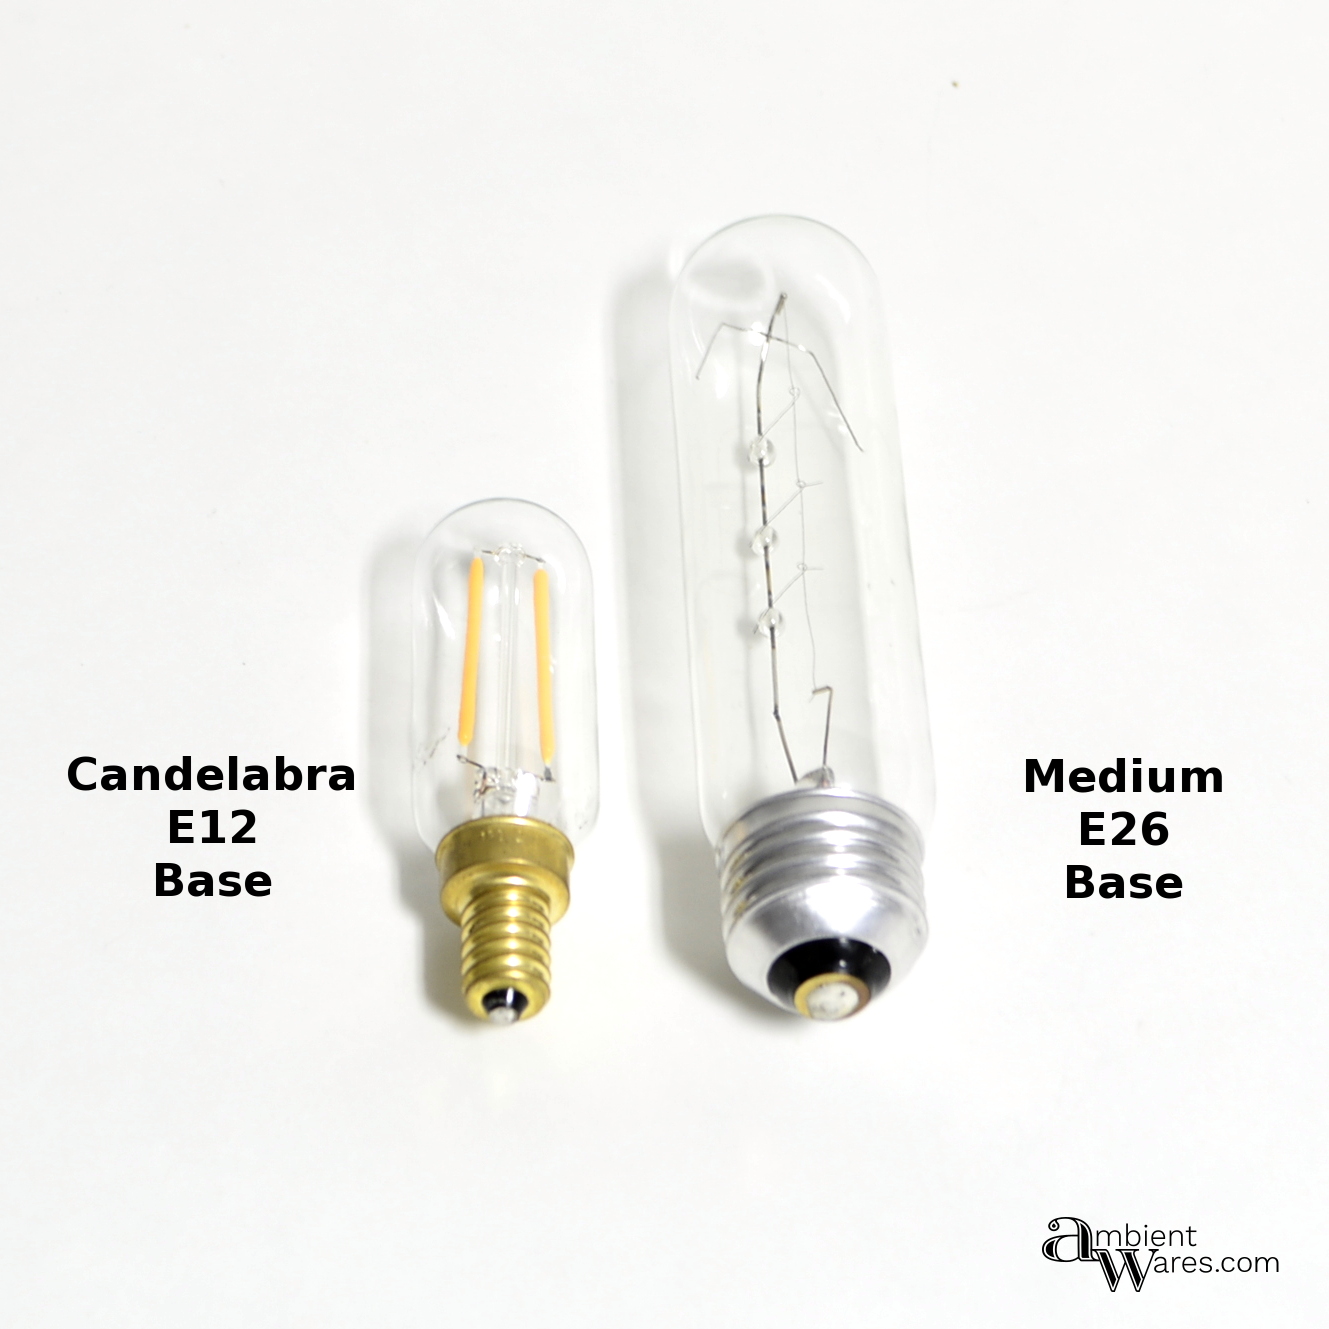
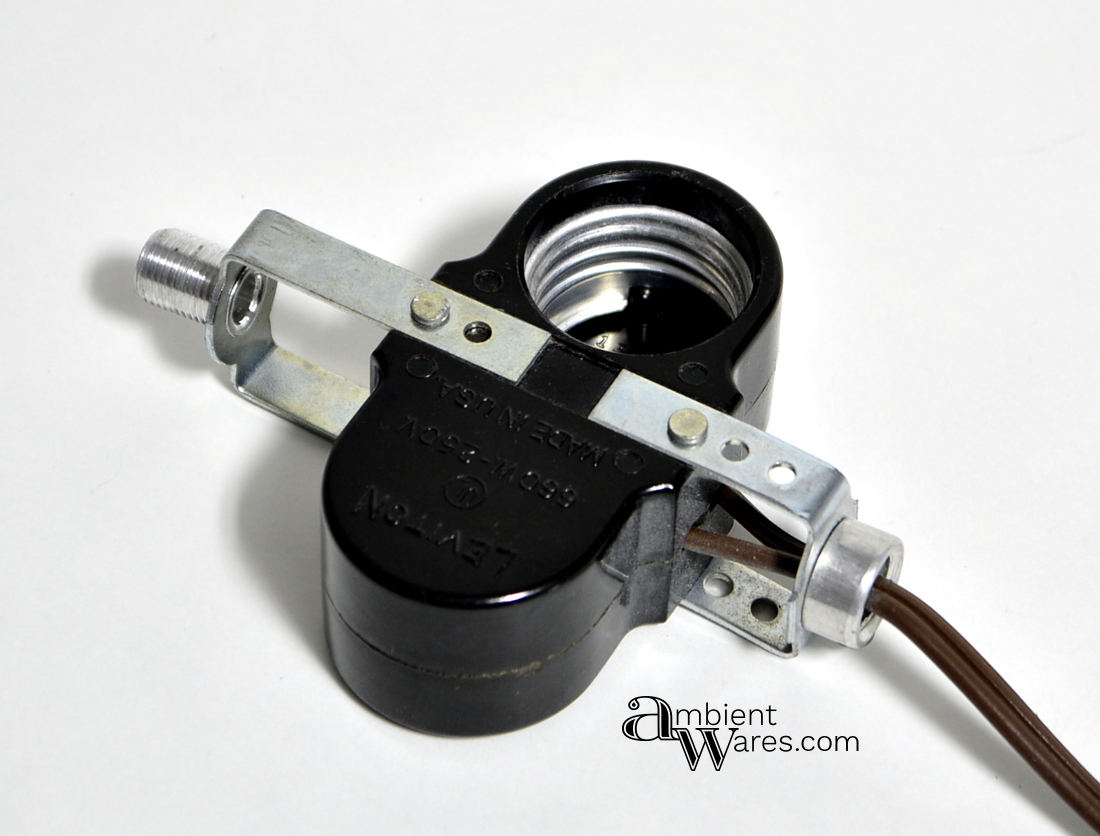
Bulb sockets come in a range of styles and materials. Some sockets include switches in them and some do not. Many single bulb lamps have a pull cord, twist knob or push through switch. Sockets are commonly made in plastic (phenolic), porcelain and metal. You can choose the material that fits your project best.
Bulb sockets usually have screws for attaching the wires. The white wire (neutral) attaches to the silver screw and the black (hot) wire attaches to the brass screw. A green screw would be for a ground wire.
Cluster sockets are multiple light sockets in one part. These are handy for larger lamps that need a lot of light output. You can also build your own with a cluster body and individual sockets like we did on this fan lamp.
There are a multitude of switches available for lamps. Some common types are in-line cord, photo-electric (turns on when dark), pull-chain, push button, rotary and toggle. You can choose any switch that fits the style and works in your lamp.
Dimmers are useful when you don’t need as much light in a room or if you want ‘mood lighting’. If there is room inside your lamp, you can wire in a rotary dimmer switch like this one we used in the fan lamp. Be sure the dimmer can support the amount of current needed for your bulbs. Touch dimmers are good if you don’t want a visible knob. There are also in-line cord and plug in dimmers available for easily upgrading older lamps without the need to take it apart. If you plan to use LED bulbs check to make sure the dimmer supports them. LED bulbs have additional circuitry in them and work differently than standard incandescent bulbs.
5. Mechanical Lamp Parts (the nuts and bolts)
The most common type of pipe threading for lamps is 1/8 IPS which has an outer diameter of 3/8″. This is useful since you can reuse parts from old broken lamps in your new custom lamp. If you have parts of a different size you can use couplings, nipples, nozzles and reducers as adapters. Pipes are available in different straight lengths or even as pre-bent arms for chandeliers or wall sconces.
SPT-1 and SPT-1 1/2 cord will fit through 1/8 IPS pipe easily. SPT-2 cord will also fit, but it can be difficult to push through. When using SPT-2, it’s recommended to use a larger pipe size (1/4″ IPS or larger).
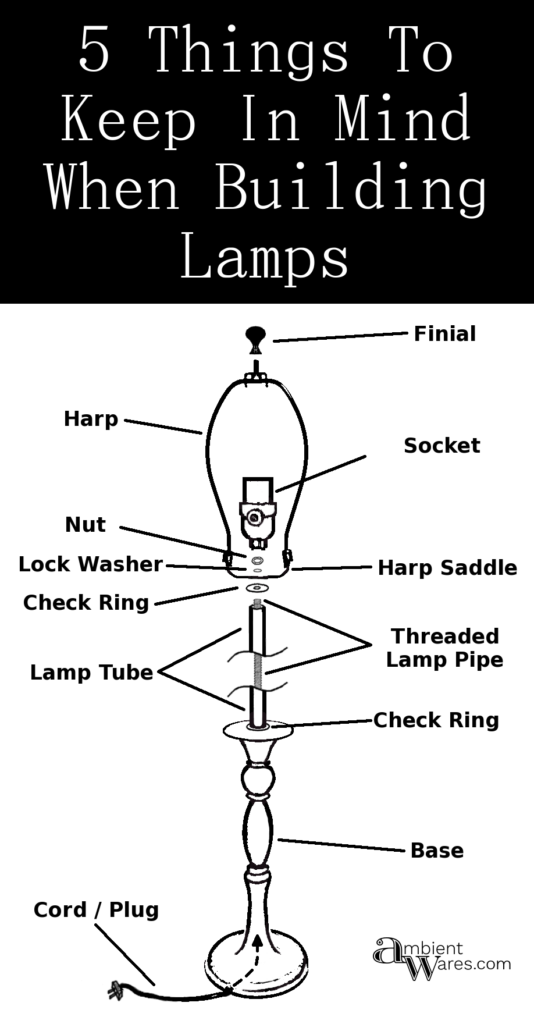
Check rings are used to center a threaded pipe inside a larger decorative pipe. They look like a washer but the outer edge is curved and bent inward to hold the outer pipe. Lock washers should be used in combination with a hex nut to ‘lock’ the nut in place. I also recommend using thread lock with nuts.
Lamp harps hold the shade onto to lamp. They come in various sizes and finishes. The bottom piece of the harp is called a saddle and has a hole for mounting to a pipe. Whether you build lamps or not, I hope you find this post informative and helpful. Even if you stick with the DIY lamp kits, it’s always good to know more about what you’re working with.
PINNY PLEASE!
Great post!!
Thanks so much for stopping by!!
Hugs,
Deb
Thanks Debbie!
I think it would be so cool to built my own lamp! I am not good with electrical stuff though and am a bit intimidated, but your instructions and tutorial is easy to follow! I think I will hand it over to my hubby to give it a shot! Love the idea!
I completely understand Katrin! I’m lucky that my husband is a great “teacher”. I’ve not yet built a lamp from scratch completely on my own but, I hope to one of these days. I will not hesitate to ask the hubs if I need to though. Electricity just isn’t something you should mess around with if you don’t understand it 😉