
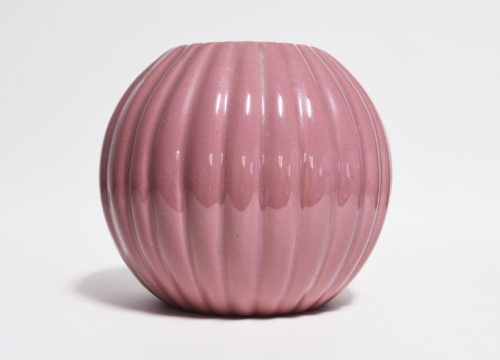
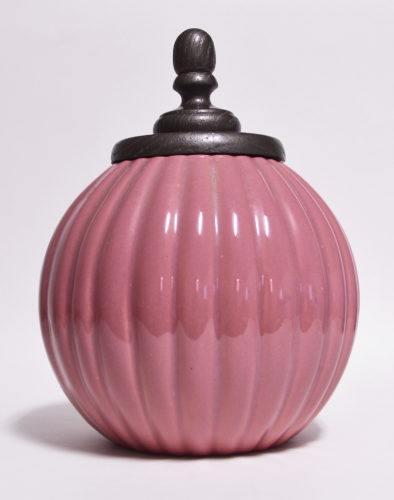
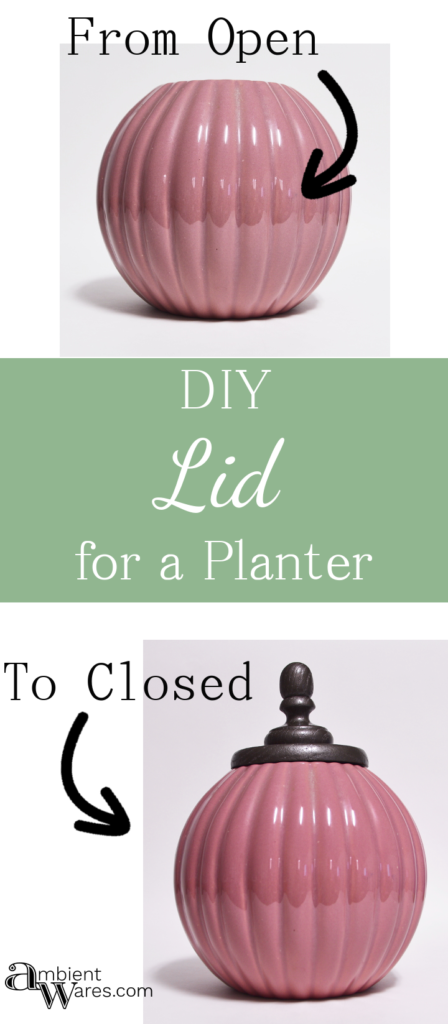
I found this small, pink, ribbed planter at a thrift store for 50¢ down from $8.00. It was before Halloween and I was walking around sizing everything up and planning their futures as pumpkins. It didn’t matter what it was; that was my thought process. Which really does help when you’re looking for inspiration.
Sometimes I walk in to a store and wait for a project to jump out at me. Other times, I go in with a mission, look at each item in a specific way fully expecting it to transform in front of my eyes. This time, everything I looked at was morphing into a pumpkin. Including this little planter.

Turns out it’s a Haeger planter which to me, really doesn’t mean anything. Especially value wise. I guess it does explain why the store had it at $8.00. Regardless, this idea doesn’t effect the vase at all. It only adds to it.
Please know some links in this post are affiliate links. If you click on a link and make a purchase, I receive a small commission with no extra cost to you. Thank you. Click here for my full disclosure.
Materials used:
- Planter
- Ruler/Tape Measure
- Pencil Compass (similar to this)
- Pencil
- Tin Can
- Scrap Wood
- Band Saw
- Router
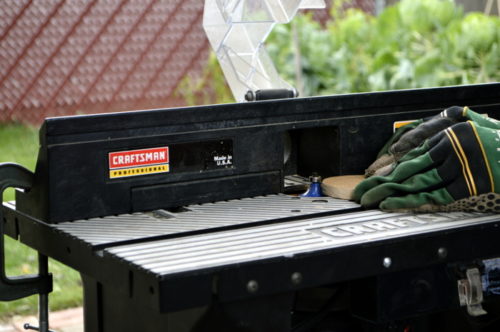
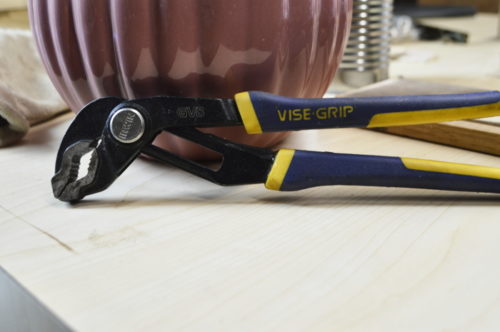
- VISE-GRIP (we use this kind)
- Drill
- Drill Bit
- Wood Glue (we use this kind)
- 1 Wood Screw
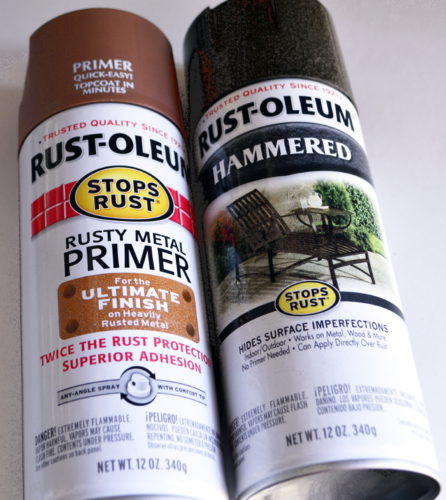
- Rusty Metal Primer (we use this kind)
- Hammered Bronze Spray Paint (we use this kind)

Measurements
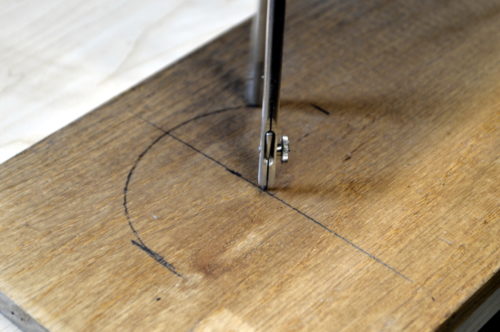
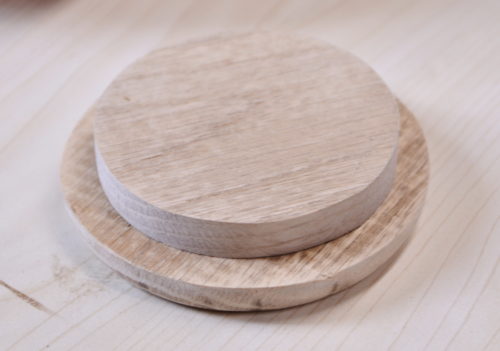
The top is about 3 1/2″ in diameter and we measured beyond the actual opening. The piece we make will rest on the top and hopefully look “natural”. 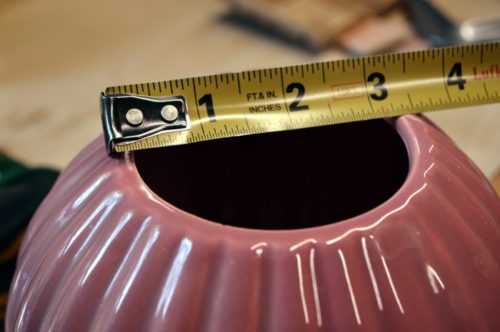 On a piece of scrap wood, we measured out 3 1/2″ and marked the center.
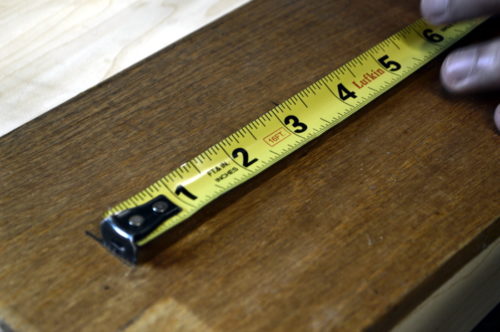
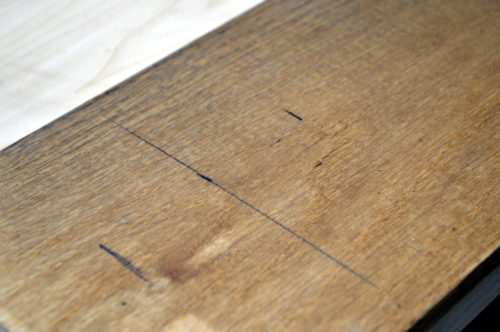 Then, using a compass, drew a circle.
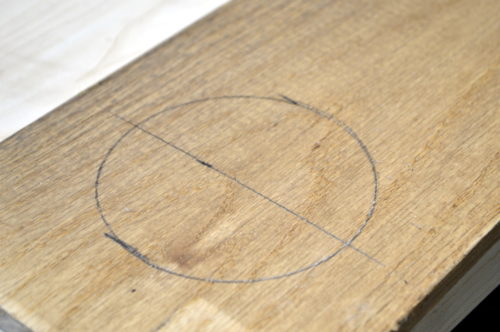
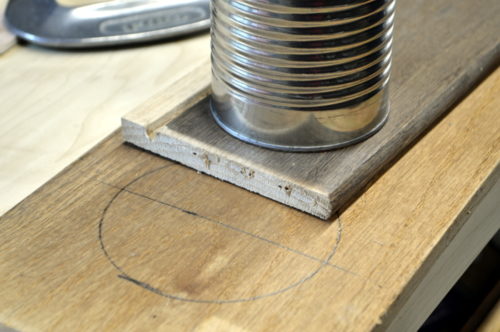
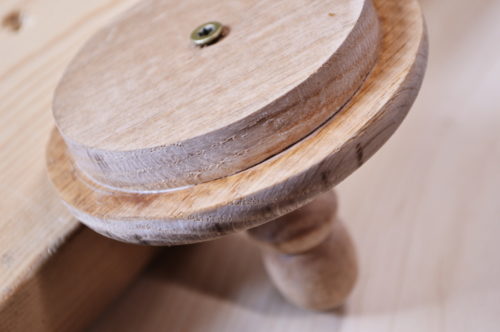
I realized the single lid alone would’t work. I’d also need a second piece to act as a lip. It would rest within the opening preventing the lid from sliding off. For that piece, I used a tin can to trace. The tin can fit through the opening on the planter perfectly.
Cuts
The 2 circles were cut using our band saw. If interested, here’s some info on band saw safety. We’re showing you how not to do it. We didn’t adjust the saw guide to a lower level prior to cutting. That’s a no no.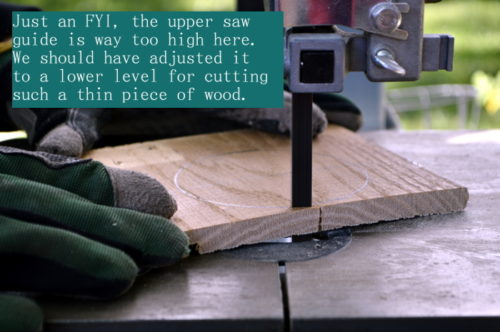
We also attempted to use our “new to us” router on the top piece and it proved we need a little more practice.
After both circles were cut, they were sanded.
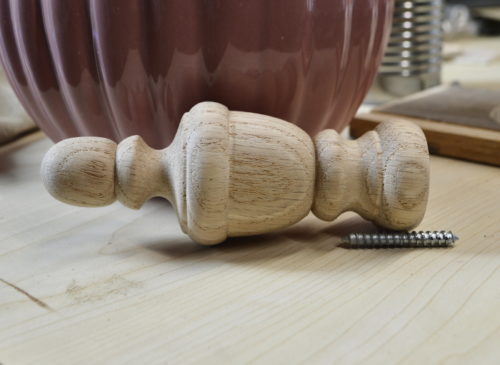
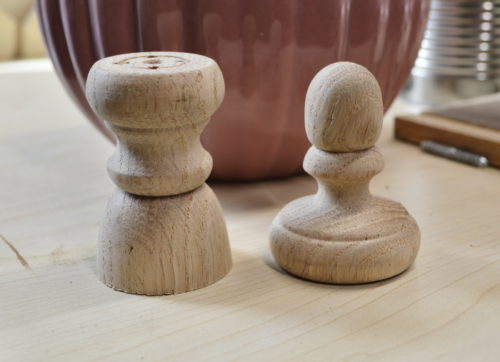
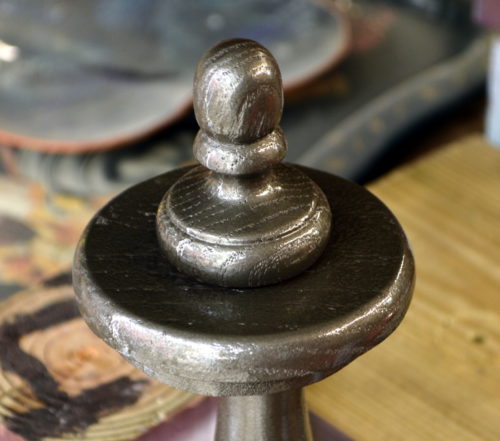
For the handle, I used an unfinished wooden finial from our stash. I think finials are great items to have on hand. I used a metal one for this pumpkin.
It needed to be cut down and I wasn’t sure how long the screw was so I removed it before cutting. The only thing I found that worked on removing it was our vise grip.
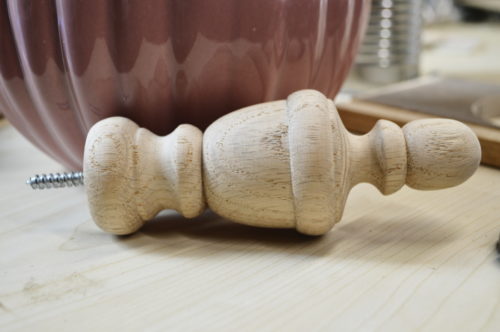
I would have been fine cutting it where I did but, I wasn’t taking any chances.
Drilling & Securing
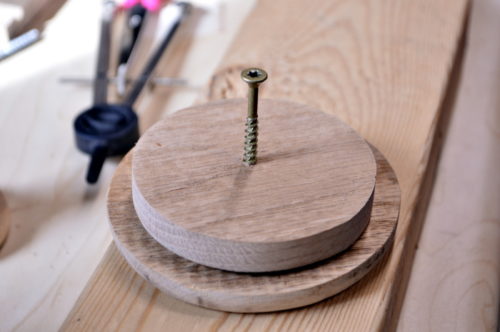
We found the center of each circle and drilled a pilot hole all the way through.

We then took a wood screw and drilled it down just enough into the smaller piece to where the tip was barely showing on the other side.
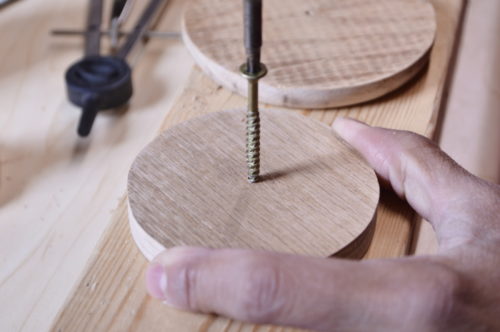
We smothered wood glue on the larger round piece, flipped the smaller circle over and moved it around until you could feel the screw had found the other hole.
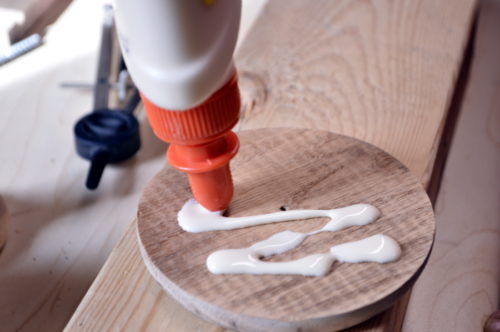
We then tightened it down a little more until the tip was coming out of the larger circle. The glue was wiped up with a damp cloth.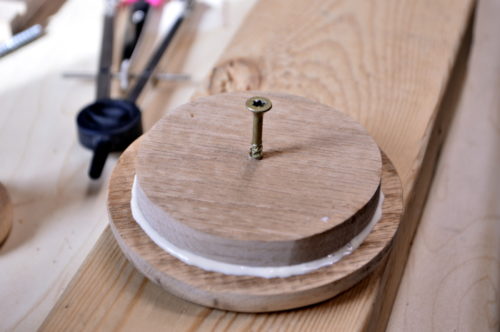
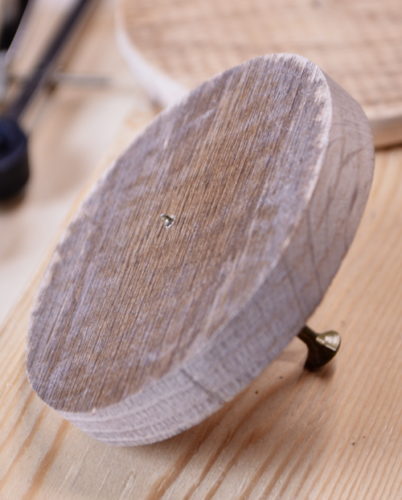
It might be hard to tell below but, you can see the screw top at the bottom, then the small circle (lip), then the larger circle with the tip of the screw barely showing. This is where the finial will attach.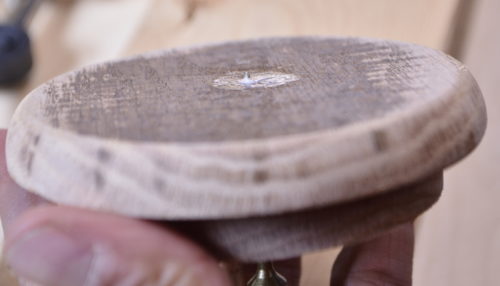
Painting
I primed the finial first and followed up with hammered bronze. This one can has lasted through the potting bench, the beverage station, and countless other small things I never wrote about but, it decided to give up just after finishing this little lid.
Do you have anything you’d like to spruce up but, not physically change? Put a lid on it!
My Amazon Picks…
PINNY PLEASE!
Super cool! I’ve never thought to make a lid with wood like this, but I love my band saw. =)
Thank you so much Natasha! Oh, the band saw was the best purchase I’d made in a while. Got it at a garage sale for $60!
Now that just blew my mind Angie. Such a simple solution, but wow, what a difference. That’s really, really cool. No planter or vase will ever be safe again, brilliant and your tut was super descriptive and so easy to follow. Pinning
Hi Michelle! I love that I can change something up without actually changing it 🙂
Love this ! So cute ?