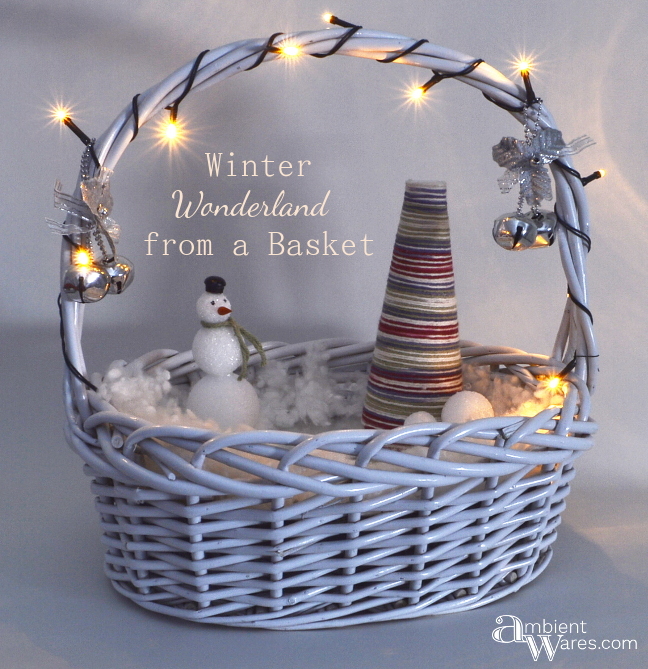
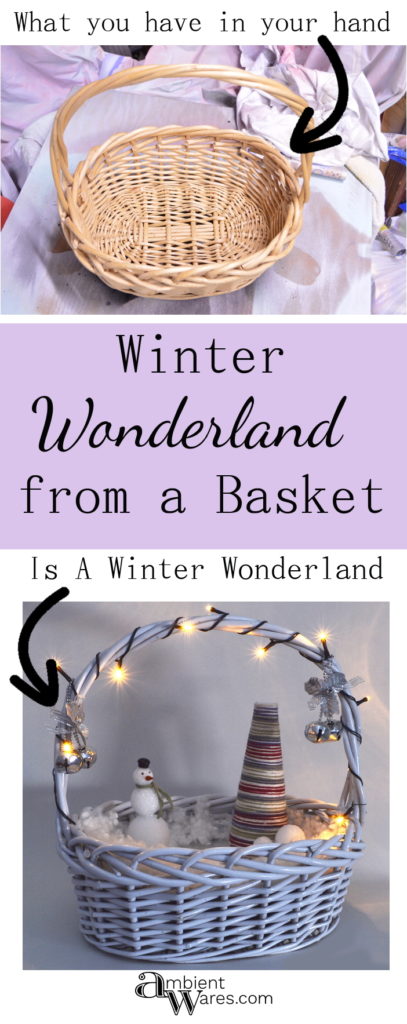
This is one of those projects where there’s definitely no right or wrong way to do it. You just keep adding or taking out what you like and what you don’t. You could go a minimalistic route or clutter the heck out of it. Baskets vary in size and shape so what I did won’t necessarily work for you but, it’s the idea that hopefully will.
Please know some links in this post are affiliate links. If you click on a link and make a purchase, I receive a small commission with no extra cost to you. Thank you. Click here for my full disclosure.

Materials I used
- Basket
- White Spray Paint (I use this)
- Cardboard
- Pencil
- Utility Knife (I use this)
- Scissors
- White Felt
- Oval Shaped 8 x 10 Mirror
- Yarn
- Hot Glue Gun & Stick (similar to what I use)
- Paint Brush
- Cluster Fiber Fill (I use this)
- Furniture Plug
- Black Marker
- Black Paint (I use this)
- Craft Sticks (similar to what I use)
- Dremel (similar to what we use)
- Orange Paint Marker
- Tacky Adhesive (I use this)
- Floral Wire
- Dollar Store Items
- Floral Foam Tree
- Floral Foam Various Sized Balls
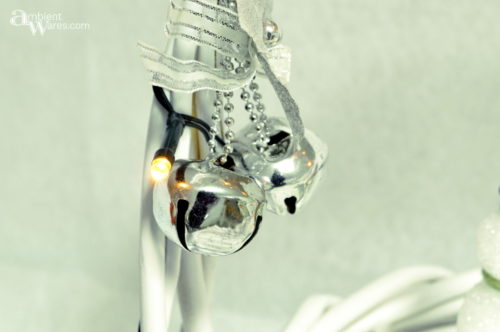
- 2 Pack Decorative Bells
- 10 yellow LED light set (takes 2 double AA batteries)
- 2 Double AA batteries
- Small Screwdriver (to remove battery cover)
Are you surprised to see the length of this list? Me too! Although by the end of it, it doesn’t seem like that many items were used.
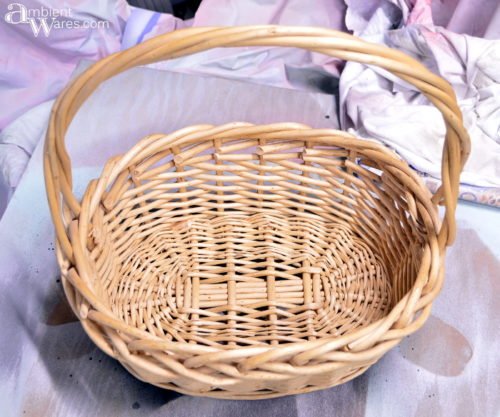
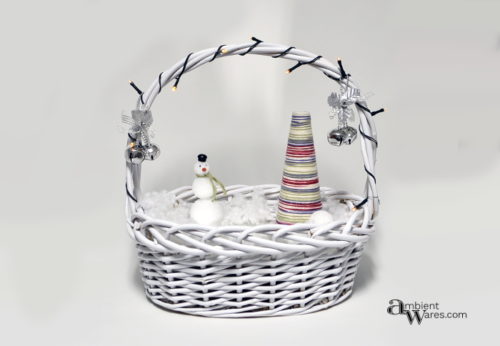
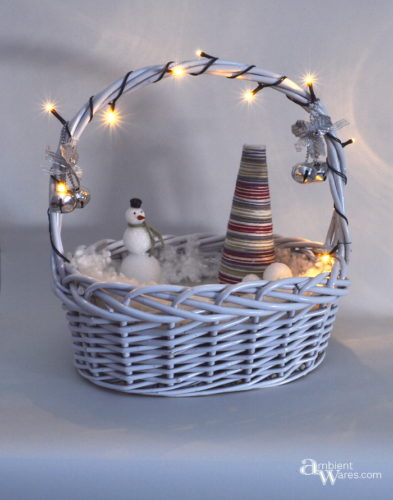
I started off by painting my basket white.
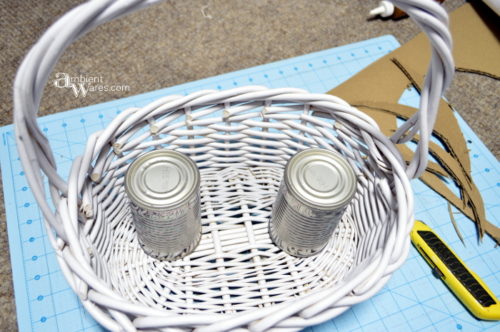
Once the paint had fully dried, I worked on the “floor” or base. To me, it needed to be raised yet not flush with the top edge. I had placed a couple of cans on the bottom and they were actually too high for my liking but, I wanted to see it put together before I decided. I sloppily traced around the basket onto a piece of cardboard and placed the cans inside the basket.

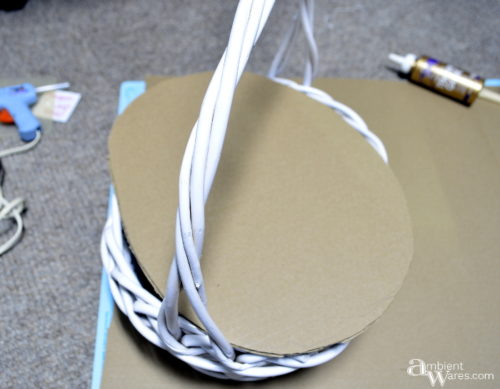
I kept trimming the floor until it fit. Once it did, I cut a piece of white felt and hot glued it to the cardboard. I didn’t cover the entire thing, I just wanted enough to where it wouldn’t move or slide off. Be sure the glue isn’t too mounded otherwise, it’ll be noticeable.
Turns out I didn’t need those cans at all. The weave of the basket ended up sticking out enough that I placed the cardboard in and it stayed put!
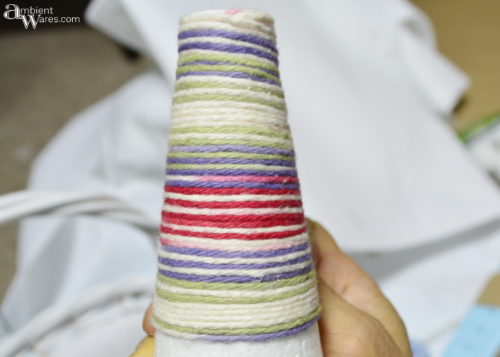
On to the decorations….unfortunately the dollar store foam tree doesn’t have a pointy top. Using the same yarn as I did for the cords of my candelabra lights, I wrapped it up using hot glue at the beginning, the end, and a couple dabs periodically throughout.
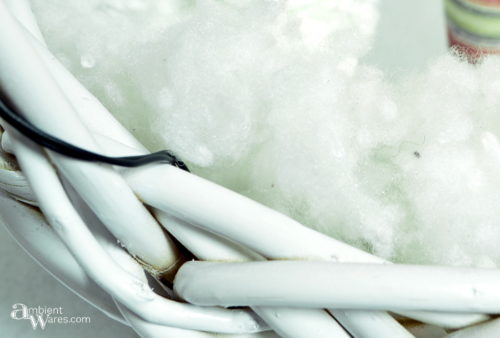
Earlier, I had wound the light strand around the basket handle from one side to the other. I secured the end (not the battery pack) with a piece of floral wire to the handle. At first I thought I could hide the battery pack under the cardboard but, that meant I’d have to pull up the floor each time I wanted to turn it on or off. No way, especially now that it was wedged in there pretty good.
Side note: At first I was a little disappointed when I turned on the lights and they were yellow. It says it right on the package, I just didn’t notice. Not sure if our particular dollar store sells white but, these have definitely grown on me.
I tried using a sleigh I had, to cover the battery pack which worked however, the sleigh looked huge in such a little space so I ditched it.
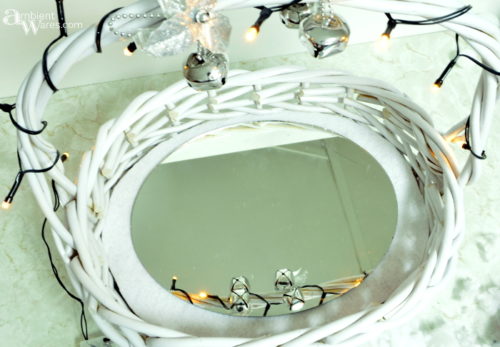
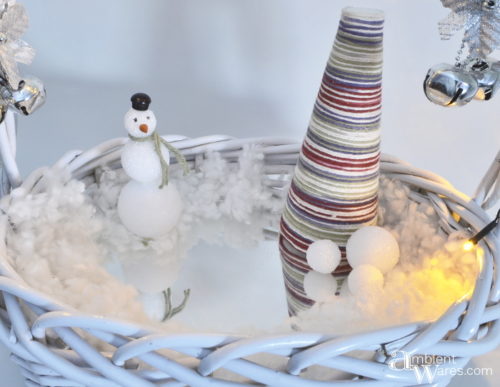
Switching thought gears, I had recently bought an 8×10 oval shaped mirror at the thrift store. Hmmm, oval shaped mirror, oval shaped basket, maybe it would look like an ice skating rink or maybe it would just reflect the lights brightening it up even more.
I think this is when I started to gain confidence in what I wanted for my Winter Wonderland Basket. I have a bag of cluster fiber fill and placed it all around the inside edge of the basket. I placed the tree on the mirror and threw a couple of those foam balls from the dollar store next to it.
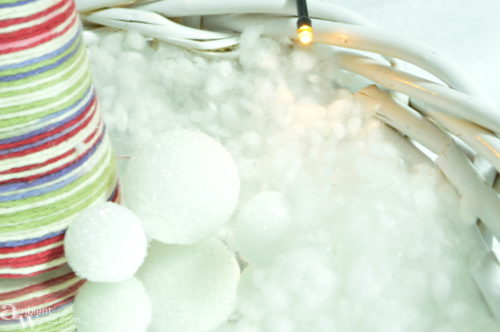
On the other side, where the battery pack was, I lightly put the cluster fill over it and voilà; covered it perfectly and can be turned on/off with no problems.
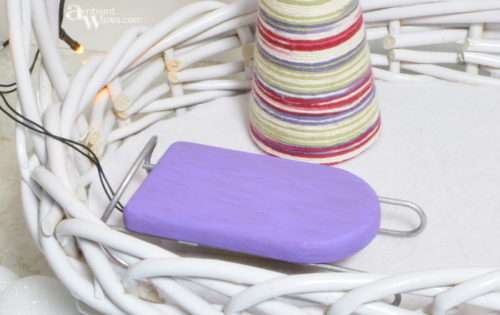
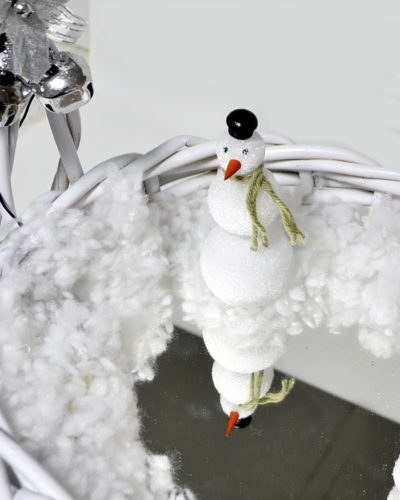
Next, I made the snowman using those foam balls (pack of 8 varied sizes). The scarf was a piece of yarn. The hat; a furniture plug painted black. The nose was the tip of a pointed craft stick which I used here too. I cut the tip off with the Dremel and hot glue was used for everything. The eyes were made with a black marker.
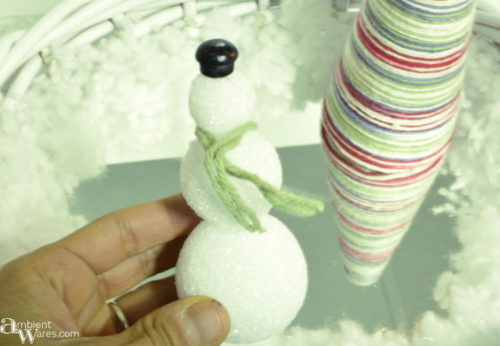
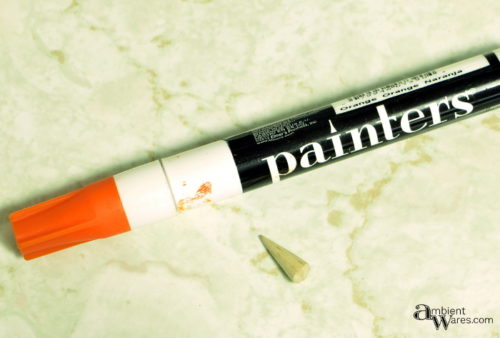
I used a painters marker to color the nose.
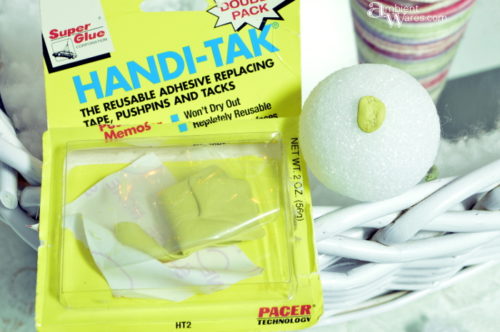
Then, for the bottom of the snowman, I used a tiny bit of tacky adhesive. I’m pretty sure I’ve had this same package since high school.

When it came to the bells I hung them over a couple of the lights.
What’s really nice is that nothing is permanently attached to the basket. Although permanence isn’t a bad thing but, I really like my basket. Just think of all the different lands that can be made. They certainly don’t have to be Winter Wonderlands.
I was thinking next year, maybe I could make little “kits” for my nieces and nephews as their gifts and they can make their own winter wonderlands. We usually get together before the actual day of Christmas anyway so it’s something they could enjoy until Santa arrives.
So, what land would your basket represent?

My Amazon Picks
PINNY PLEASE!
This came out really cute, the mirror worked perfectly. Sometimes the best ideas come when you play around with the design a bit. Very sweet and great idea thinking of making a kit from it. Thank you for sharing on Merry Monday! Sharing on G+! Have a great week!
Kim
Thank you Kim for hosting, stopping by, and sharing! I appreciate it 😉
I love your miniature Winter Wonderland Angie. It’s so cute and they way you put the snowman together and hid the battery pack, awwww man that’s so clever. I think I’d probably also go for a Winter scene, I love the idea of using the mirror to make an ice rink and I can only imagine the possibilities for Easter.
Thank you Michelle! I just love looking at it all lit up on the dark 🙂 Oh yeah, it could be really awesome for Easter!