

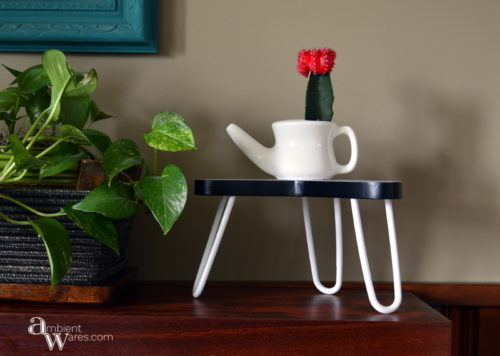
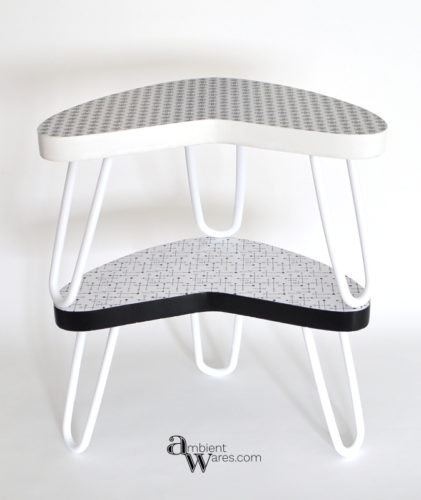
This MCM modern plant stand project started out as an experiment. I wanted to test ‘gluing’ a laser printed pattern onto wood with Polycrylic instead of the more common Mod Podge method. At the start, I had other ideas for the final piece but it quickly turned into a completed mid-century styled plant stand with the clever idea of adding some hard plastic hangers cut to length for legs.
Please know some links in this post are affiliate links. If you click on a link and make a purchase, I receive a small commission with no extra cost to you. Thank you. Click here for my full disclosure

Materials Used
- 8 1/2″ x 11″ white paper
- 8 1/2″ x 11″ x 3/4″ Wood Scrap
- Digital pattern to print (available below)
- White Paint
- Black Paint
- Minwax Polycrylic Semi Gloss
- White Plastic Hangers
- E6000
- Sandpaper
Tools Used
- Canon D530 (we use this black & white printer)
- Scissors
- Pliers
- Band saw, scroll saw or jig saw
- Palm Sander
- Drill & 5/16″ Bit
- Wood Clamps
- Ruler
- Brayer Roller
- Utility Knife
- Cutting Mat
The Experiment
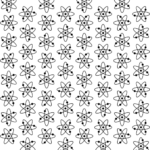
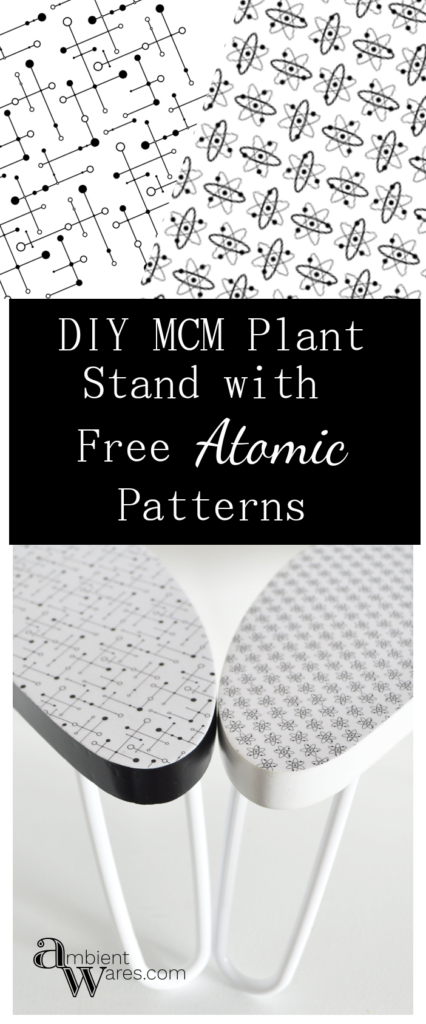
Angie and I like the Mid Century style. Me, being on the nerdy side, like the atomic MCM prints in particular and I wanted to find an easy way to get a repetitive atom pattern onto some wood. Stencils and paint would be too difficult and time consuming. The idea is to print out an image with our black and white laser printer and ‘glue’ it onto wood. Many DIYers use Mod Podge to attach paper on wood, but I’ve read that it can soften, turn yellow in prolonged sunlight and stay tacky. Polycrylic is used to protect wood furniture, will not yellow over time and dries to a smooth, hard finish.
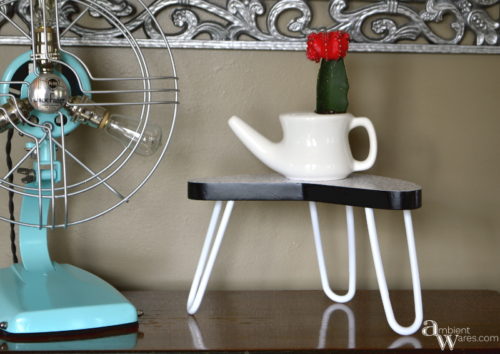
So, the experiment begins. Note, I ended up making two plant stands because the first was turning out so well and I wanted better pictures of the process. The first one was done totally out of order from this post since the plant stand idea hadn’t come to us yet.
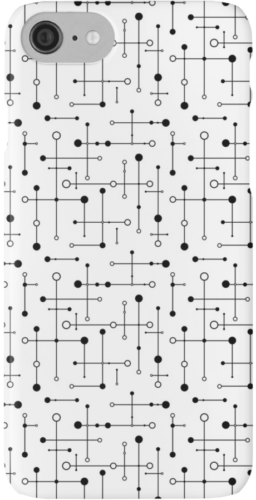
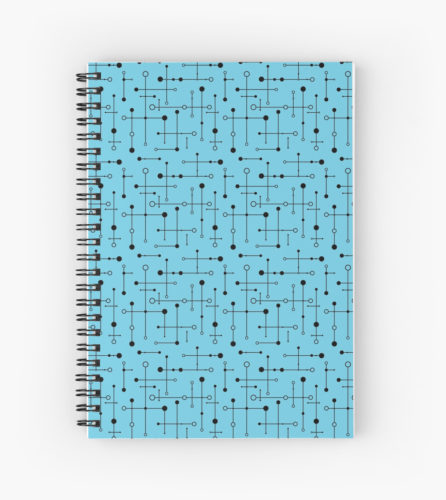
MCM Pattern
There are plenty of MCM patterns available on the Internet for purchase and while I did like many of them, I decided to make my own using the free and open source Inkscape Vector Graphics program. It’s available for Windows, Mac and Linux (I use the Linux version; did I mention I’m a bit nerdy? 😀 ).
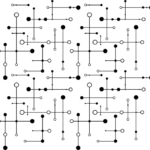
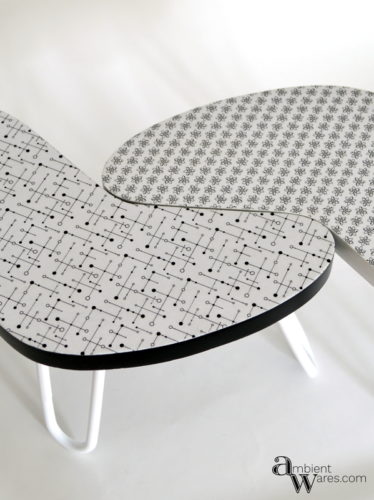
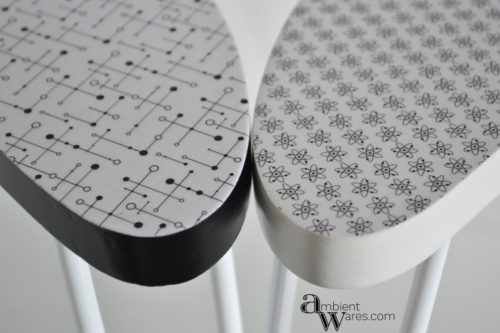
I won’t go into details of how I made the patterns as there are good written tutorials and youtube videos to help you get started if you’re not familiar with the Inkscape software. The first is an atomic pattern and the second is a lines and dots pattern. There are PDF’s below which can be printed on 8 1/2″ x 11″ (letter) paper or 8 1/2″ x 14″ (legal) paper.

For the Polycrylic “gluing” process described in this post, the pattern must be printed on a laser printer. We tried this with Inkjet printed paper and it did not work.
Plant Stand Top Surface Cutout
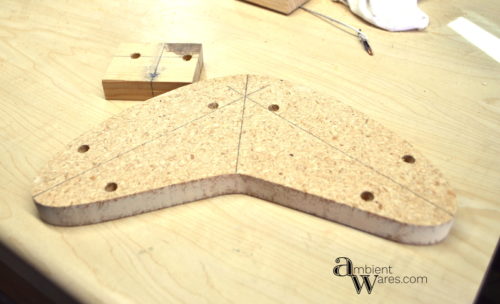
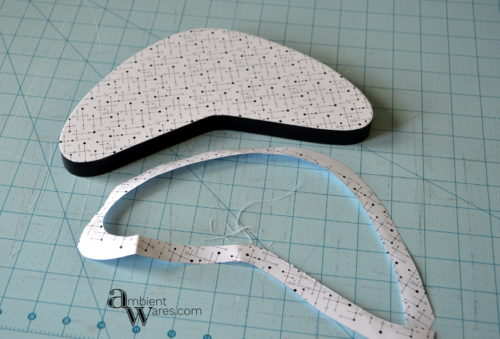
The boomerang shape is popular and appears often in MCM style. In Inkscape, I made a boomerang shape that fits on 8 1/2″ x 11″ paper, then printed and cutout the shape to use as a template for cutting the wood. The location of the leg holes is also marked on the template.
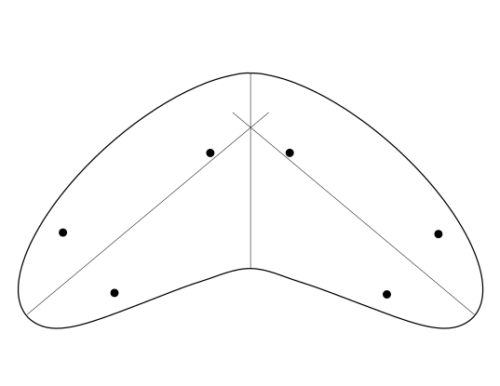 MCM Boomerang Template PDF
The paper template was cutout and traced onto a scrap piece of 3/4″ thick MDF. At this point, the plant stand idea hadn’t come to us yet and I was lucky to have chosen the 3/4″ thick wood which is needed to hold the plastic hanger legs.
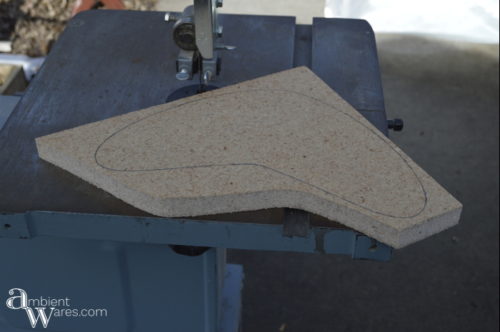
I cut the shape out with our bandsaw but it should be possible to cut it out with a scroll saw or jig saw. I had a little trouble cutting the rounded edges of the boomerang shape and found it helpful to cut straight lines from the outer (scrap) edge in to the boomerang edge. Then, as I cut out the shape, the small pieces would detach and not rub on the blade as the piece was turned.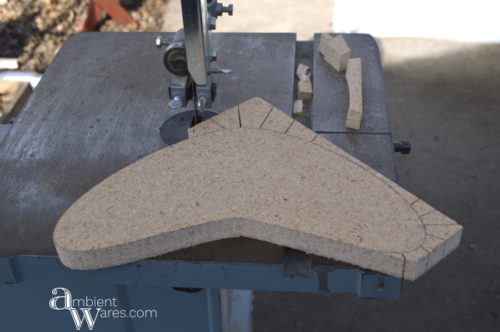
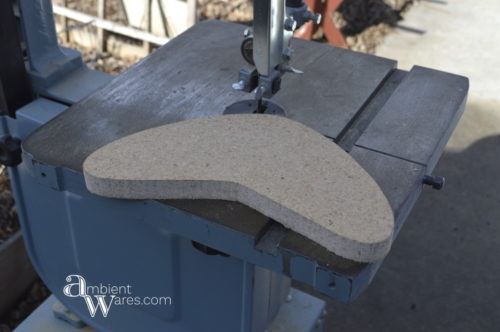 With the cutout finished, I used our palm sander with 80 grit sandpaper to clean up the cut side edge, then 220 grit by hand to smooth out the top surface and edge. MDF isn’t my favorite but for this experiment I figured it would be fine (and free since it was scrap from a remodel project). I find that the particles in MDF tend to fall out on the cut edges and leave small holes so wood putty was used to provide a smooth clean edge. You could probably avoid the putty with a piece of real wood.
Making the Legs
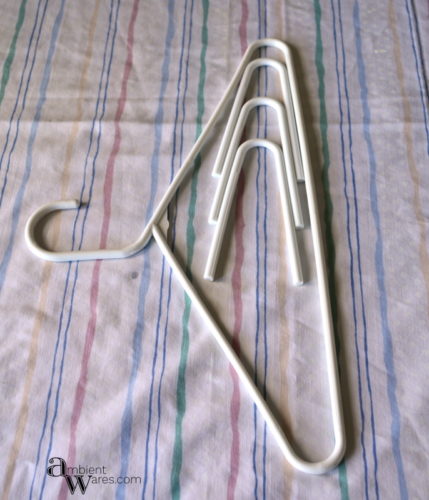
As I mentioned before, the plant stand idea came later after I had completed the top of one wood piece. Looking at the completed top Angie said “what if you use plastic hangers to make “hairpin legs”?” GENIUS! We held the completed top next to a hanger and decided the legs looked good at about 5″ long.
I measured 5 1/2″ (extra 1/2″ goes into the wood) from the corner of a hanger and cut the plastic with a pair of pliers. Towards the center of pliers there’s usually a sharp edge to allow cutting. Then, I used this first leg to mark the remaining hanger for the other legs and cut them. The cut ends were sanded to remove any plastic burrs. One plant stand needs two plastic hangers for a set of three legs. We chose white to match the black and white pattern.
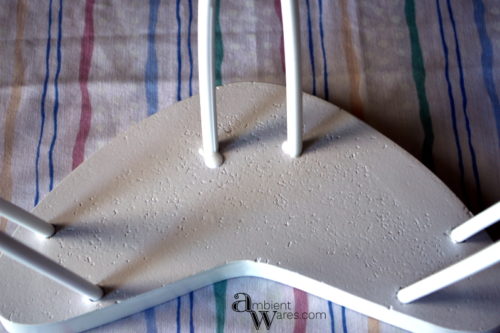
Leg Holes
Making holes for the legs is the trickiest part of the project. I thought about drilling them one by one but instead opted to make a jig from scrap wood. This helped to put the holes in the right place and keep the same angle on each pair. The jig isn’t required if you want vertical (90 degree) holes for the legs or if you have a steady accurate hand to drill angled holes. If you want more details on how I made my jig, I created a PDF with instructions.
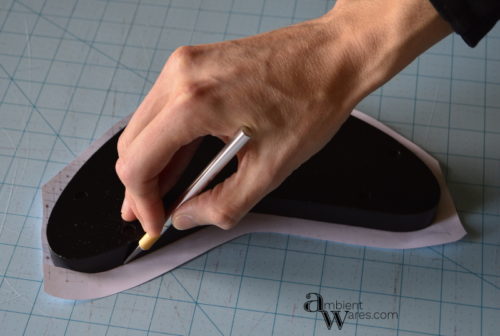
The leg hole placement is shown in the Boomerang Template. You can use that to mark the wood for drilling ‘free hand’. A 5/16″ hole was the perfect size for the plastic hangers we used to fit in. The drill bit depth is set by wrapping a piece of tape around it which shows when to stop. I don’t want to drill all the way through the wood, so I set my depth to 1/2″ since the wood is 3/4″ thick. Here’s the depth set for my jig which is on top of the plant stand wood: 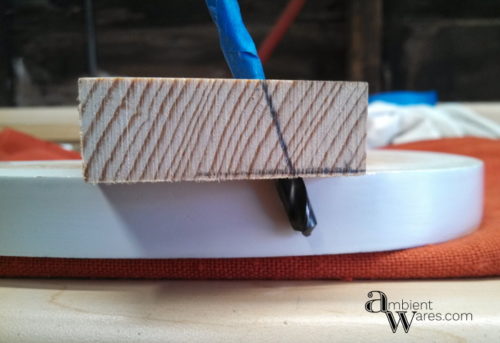
With my holes marked and drill bit depth set, I clamped the wood to the workbench and drilled the holes at roughly a 73 degree angle, stopping when the tape touched the piece.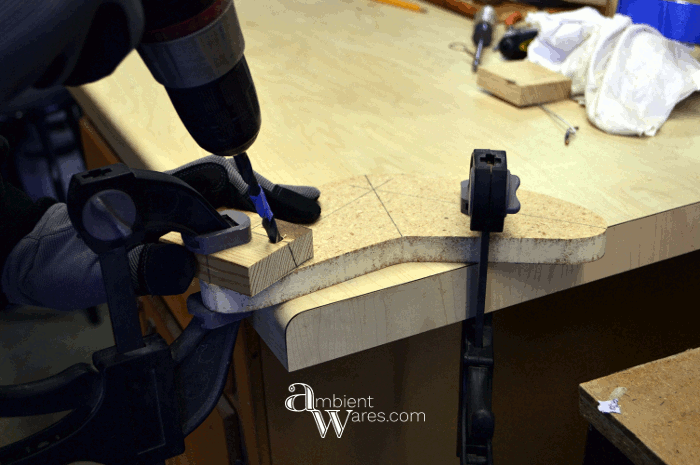
The holes are done and it’s ready for some paint!
Painting and Sealing
On the first plant stand, I did two coats of brush on white primer and one coat of semi-gloss white paint, sanding between each coat. For the second, I took the easy route and use spray primer to cover the entire piece and let it dry overnight. Then I did a coat of Black Satin Spray paint on the side and bottom. There was a bit of black over spray on the white primer top as you can see below, but that’s ok. The printed paper pattern (say that 3 times fast 🙂 ) covers it fine.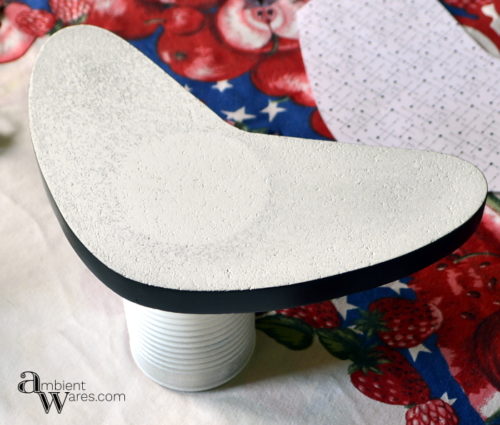
I printed my patterns on plain white 8 1/2″ x 11″ paper on our black and white laser printer. Inkjet printers may work but, I don’t have one to test it out. Not sure if the inkjet printed image would bleed when using the polycrylic. The laser printed image is fused with heat onto the paper and does not bleed at all. If you don’t have a laser printer, you can have the pattern printed at a local print shop. Update Mar 28, 2017: for an upcoming project we had a pattern printed on a wide format (24×36) inkjet printer at a local print shop and tested a piece of scrap cut off from it. Unfortunately, it did not work well at all. Turns out, paper for inkjet printers has a special coating to help the ink soak in and stay on the paper. This coating caused the Polycrylic to soak in and excessively wrinkle/bubble the paper. So, this process will only work with a laser printer and paper designed for laser printers.
I trimmed the pattern with scissors in the shape of the boomerang top leaving about 1/2″ extra. Then I held the pattern and wood piece up so that light would shine through the paper. This helped to align the pattern on the wood.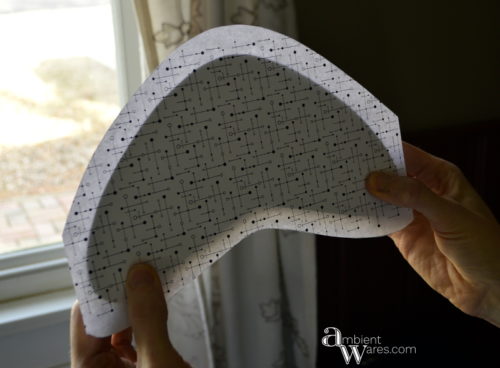 I applied pressure to the paper all the way around the outside edge to crease it which helps to align the pattern on the Polycrylic.
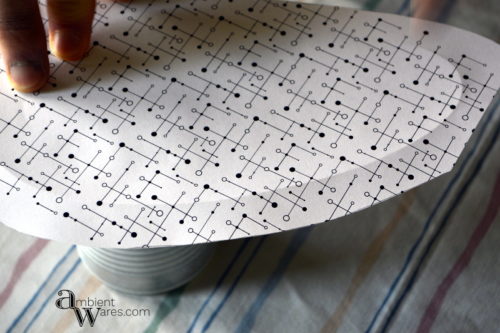 Next, I set the paper aside and applied a generous layer of Polycrylic to the top side of the wood boomerang. I set the paper on the Polycrylic and aligned the pattern using my creases at the outer edge. Then I used a brayer roller to smooth out the paper onto the wood and remove any bubbles. You could also use a plastic paint scraper or old credit card to smooth it out, just be careful not to tear the wet paper.
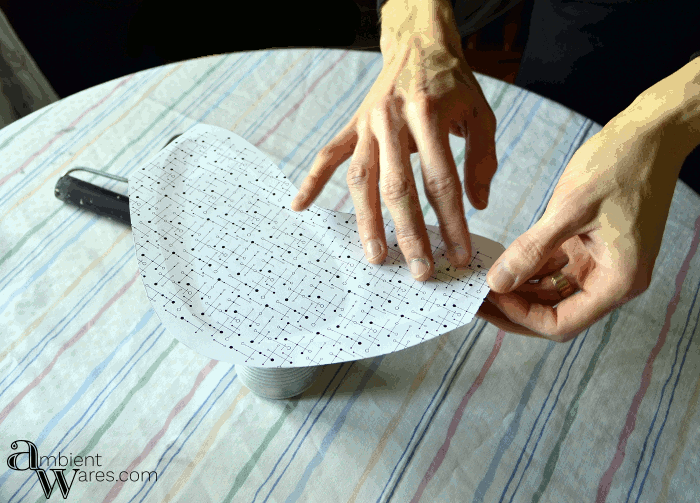 When the paper was set, I carefully picked up the piece and cleaned up the Polycrylic which had oozed out the sides and used that excess to coat the side edge.
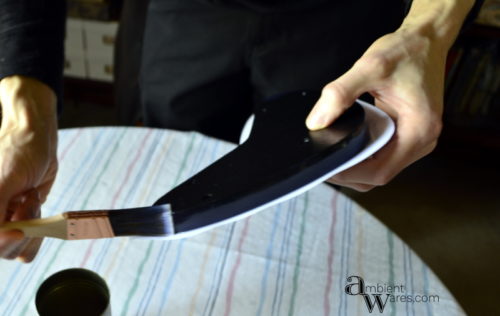
 With the paper trimmed off, I very lightly sanded the side. To get the smoothest surface, Polycrylic should be sanded between coats. Next, I applied another coat to the sides and the first coat on top of the pattern.
 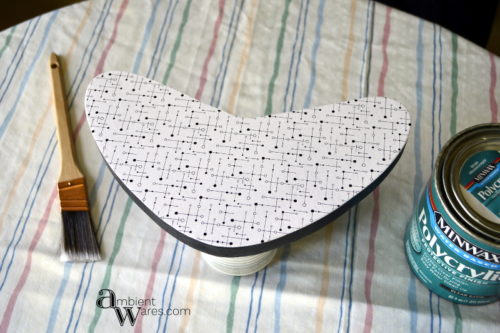 I did three coats total on the top, sanding very lightly between each. After the first coat, the paper edge was a bit rough but the gentle sanding and subsequent coats give it a smooth yet sharp edge.
Finally, the legs were attached using E6000 adhesive. I squeezed a small amount inside each leg hole and used a toothpick to smear it around. The legs fit snugly in each hole and the excess that oozed out was cleaned up with a paper towel.
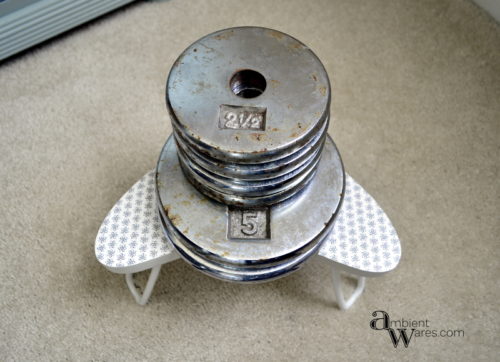
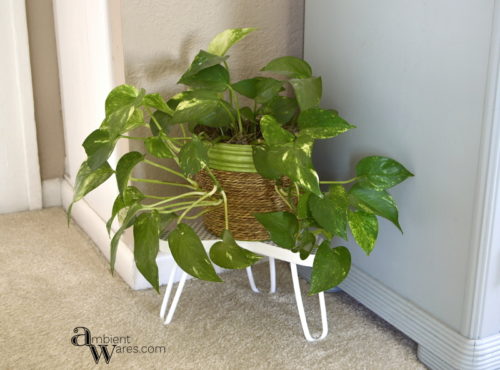
I’d say the ‘experiment’ was a success! The plant stands look wonderful, don’t you think? Using Polycrylic to ‘glue’ and seal paper on wood worked great and could be used for many other projects. What projects would you use them on?
Vanessa from Gardening In The Shade shared a couple of great projects using our patterns. The first project is along the same lines as our plant stand but uses a clay pot. The other involves using the pattern in a sewing project!
We’ve also put the lines & dots pattern up on RedBubble so you can get the pattern on any of their great products!
|
 |
This is fantastic! I can’t believe the legs are from hangers. Great idea!
Hi Lisa! Thank you so much and I can’t believe they actually worked! 😀
This are awesome little stands, and they would look great in our mid-century home. I love that you used plastic hangers instead of buying expensive hairpin legs. That’s brilliant!
Thanks, Rebecca! It might be a stretch using the hangers but, they certainly do the job 😉
I love these Angie, how clever to use hangers as hairpin legs, I can’t get over that! They look so cool!!!
Thank you Katrin! We had a lot of fun making these 🙂
Adorable! What a neat idea.
Thank you!
This is sooo cool! I love your little plant stand! I am always searching the thrift stores for anything with patterns from that era on them
I’m so glad you like like them, Vanessa! We’re really happy with how they turned out and Joe did a great job on creating those designs 😀